Saturday, June 27, 2009
Repaint: ROTF Soundwave (Part 3.1)
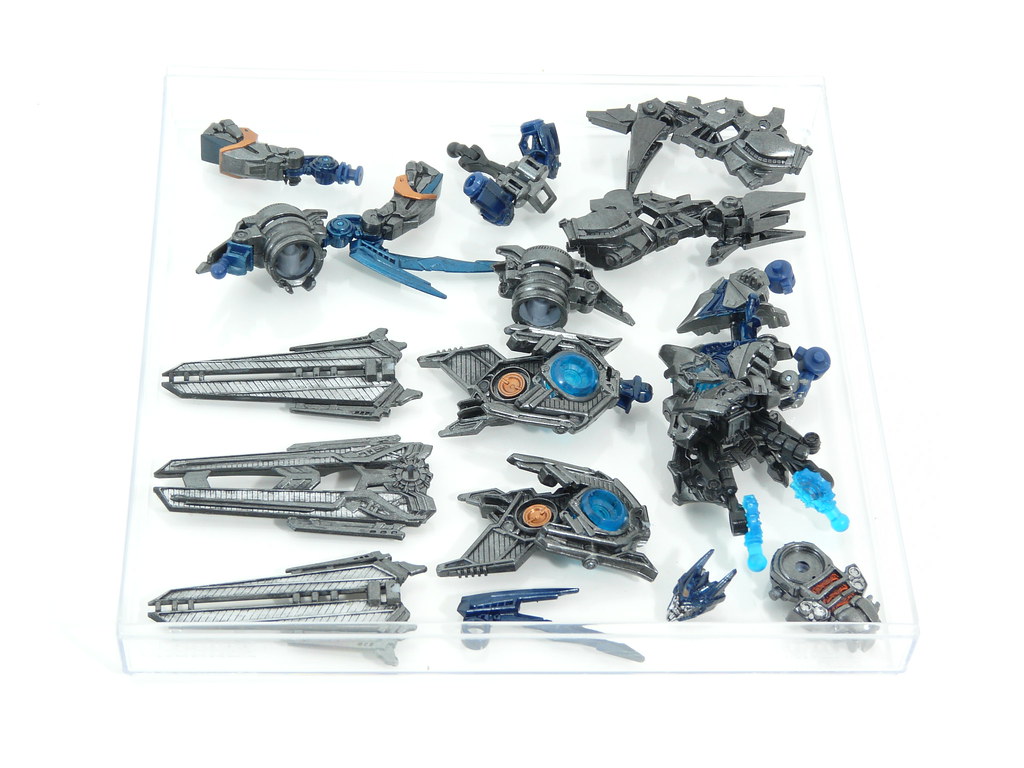
All parts are going to be stored in a Ferrero Rocher case to protect the parts from dust for the weekend while I am gone. These cases sure come in handy!
Friday, June 26, 2009
Repaint: ROTF Soundwave (Part 3)
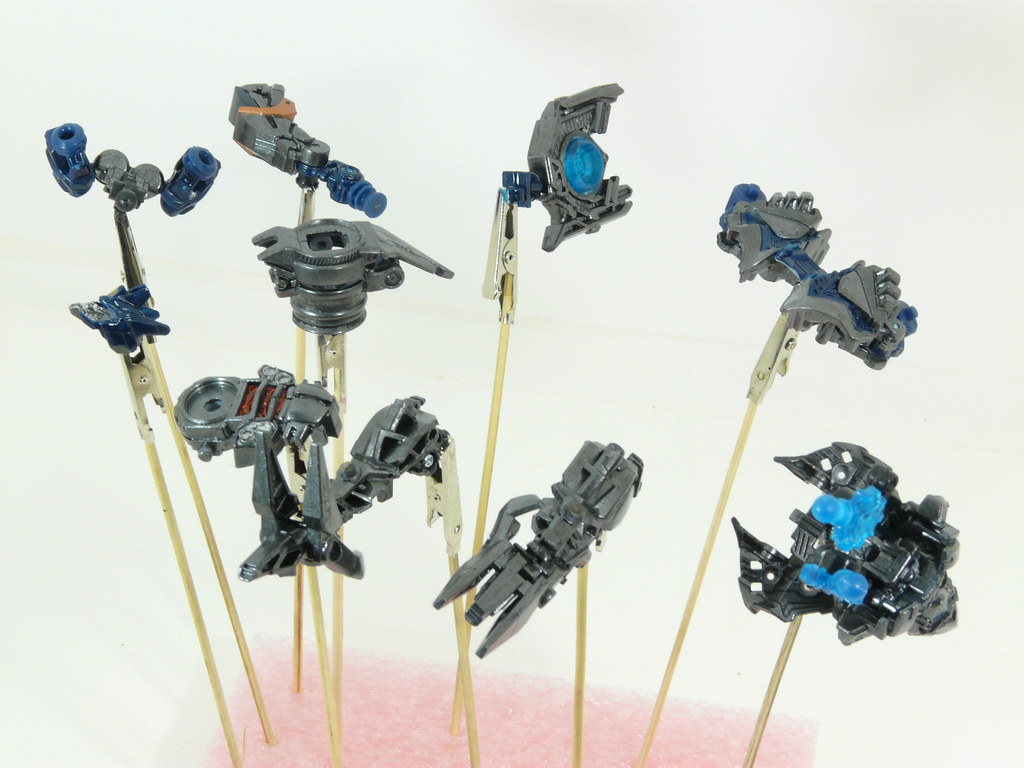
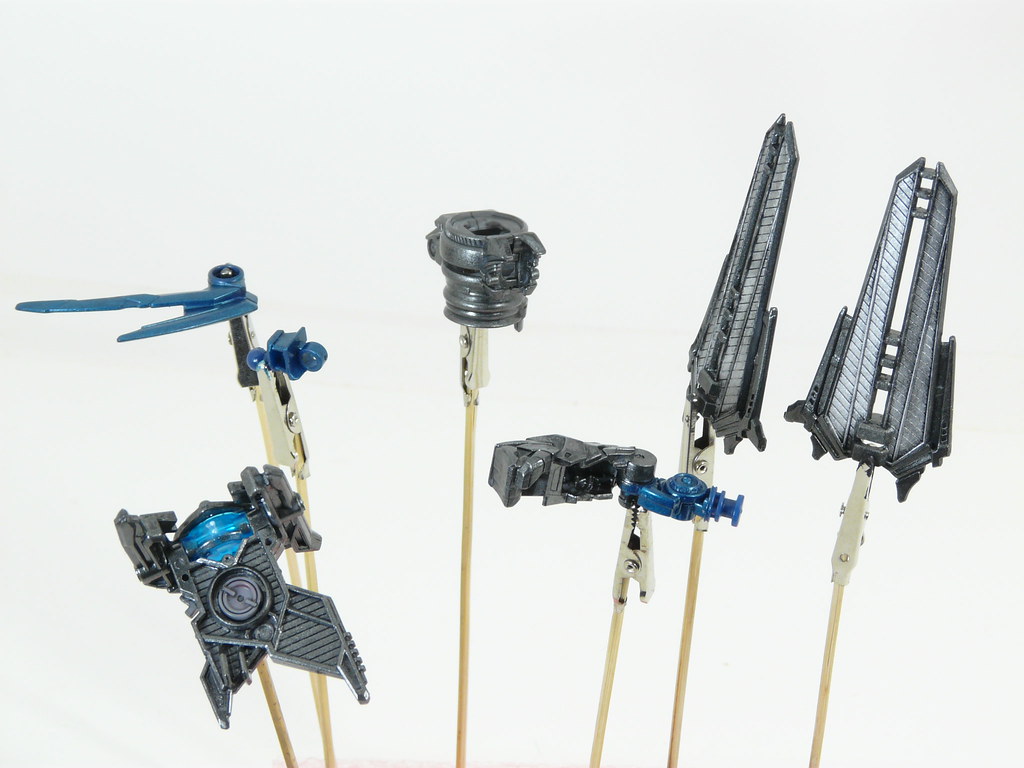
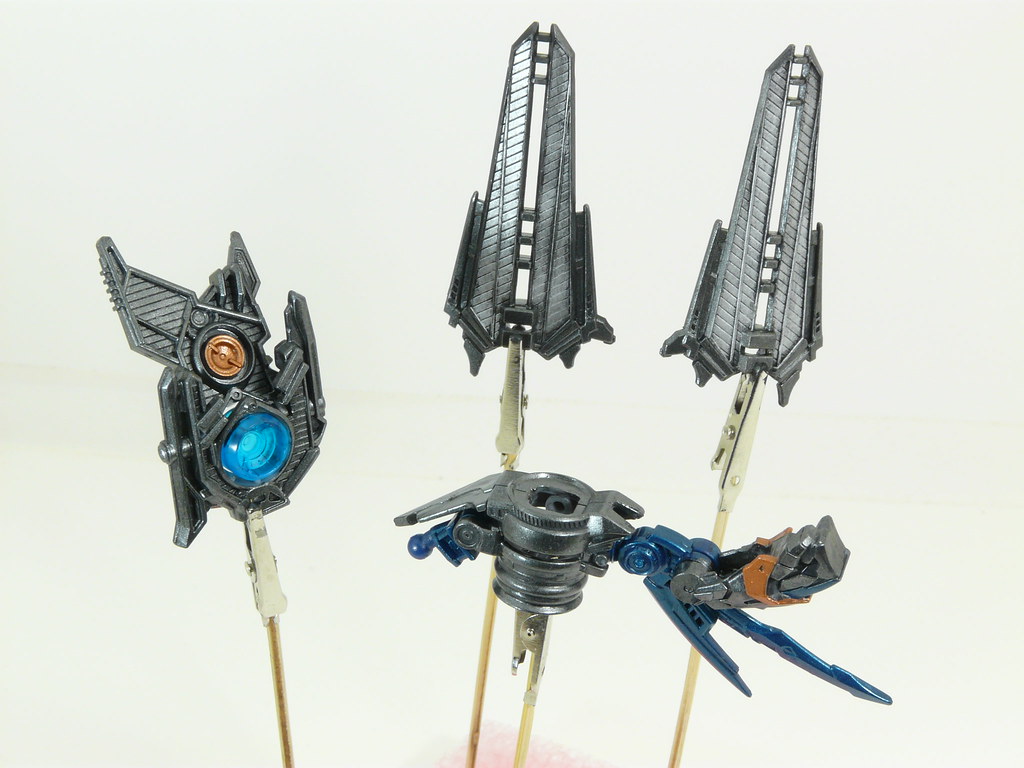
The primary painting part is pretty much done, just got the little details left on the legs. Now I am just going back over the parts and checking if there are any unpainted or uneven spot to fix up. Next week I will spray all the parts with a few layers of overcoat to protect the paint and then it will be assembled.
Yesterday I grabbed a Skids, he's going to be my next repaint project.

----------------------------------------------------------------------------------------------------------------------
This weekend, my family and I are off to a cottage that we rent and visit every year. My whole family is into fishing except for me, I am just going to enjoy the sun, take some pictures, and read some books.
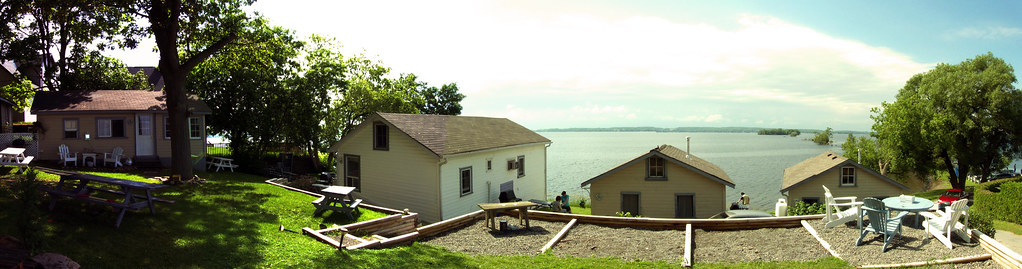
I just love watching the sun over the lake. Hope we get some clear skies over the weekend so I can look up at the pretty stars.

ROTF toyline
After seeing the movie, I thought that the molds for most of the toyline is fairly accurate. Too bad we didn't get to see Soundwave's robot mode. When I got the toy, I couldn't wait to see Soundwave in the movie, it was disappointing that he was in his satellite form during the entire movie.
In my opinion, the worst figure in Wave 1 is Wheelie. The robot mode may somewhat be movie accurate, but the vehicle mode is totally different. In the movie, Wheelie was a Ford F350, I don't even know what the toy vehicle is. Maybe it was an issue with licensing. I got excited that there was going to be a F350 transformer toy when I saw Wheelie in the movie. Maybe it's just the fact that I am into RC and happen to own that particular model. I should make my own 1:1 Wheelie LOL
In my opinion, the worst figure in Wave 1 is Wheelie. The robot mode may somewhat be movie accurate, but the vehicle mode is totally different. In the movie, Wheelie was a Ford F350, I don't even know what the toy vehicle is. Maybe it was an issue with licensing. I got excited that there was going to be a F350 transformer toy when I saw Wheelie in the movie. Maybe it's just the fact that I am into RC and happen to own that particular model. I should make my own 1:1 Wheelie LOL
Thursday, June 25, 2009
Wednesday, June 24, 2009
Repaint: ROTF Soundwave (Part 2)
Here's what I got after about 7 hours of painting. A majority of it was for the actual painting, but part of it was also to remove the factory paint apps so it won't affect the outcome of my colors. That's it for today!
Might change the flat aluminum on the panels to a darker shade like metallic grey. Just for comparison, the darker grey color on the previous post is metallic grey. That part has been changed to gun metal which is slightly darker than metallic grey.
Might change the flat aluminum on the panels to a darker shade like metallic grey. Just for comparison, the darker grey color on the previous post is metallic grey. That part has been changed to gun metal which is slightly darker than metallic grey.
Repaint: ROTF Soundwave (Part 1)
Finally decided to try some paint on my Soundwave. I think the color of the grey plastic is very different from what I saw in the movie. Or maybe he is a reflective color and is just reflecting the darkness of space. Anyways, here's the first part I did, one of his panels. This is the first coat, will touch up on it later when it has dried.
This project will take quite a long time since he has many pieces. This part here took me around 1 hour. The black wash was done a bit too heavily, but I'll see how the second one comes out. Worst case is I will have to remove the paint of this one and do it over again.
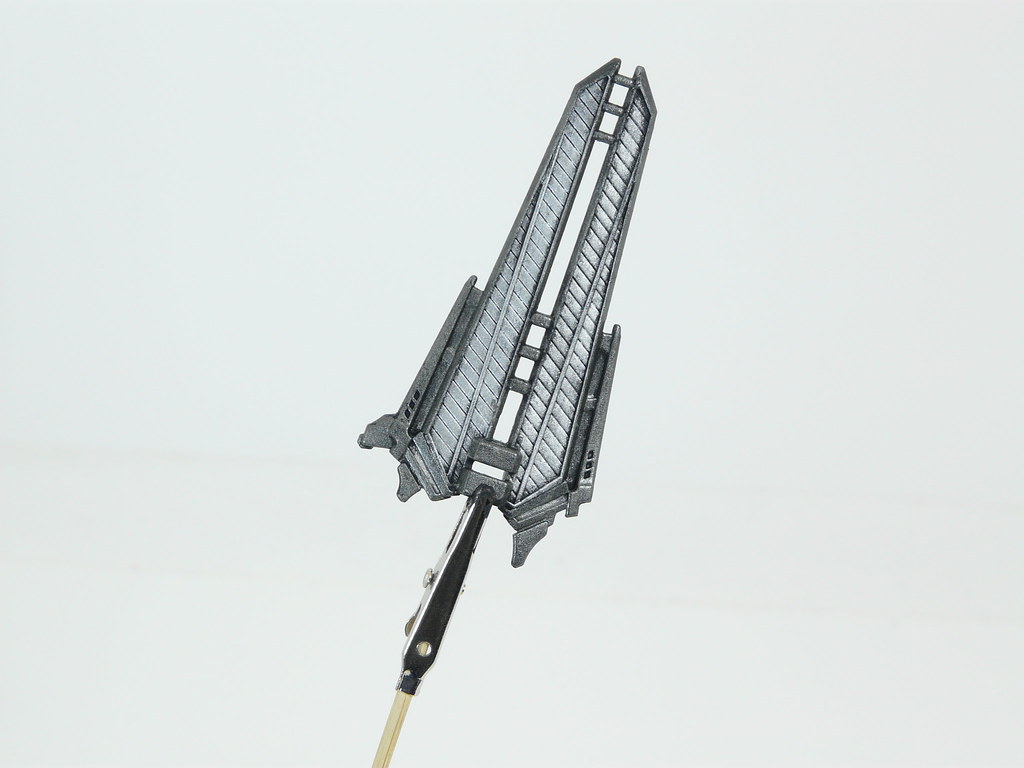
This project will take quite a long time since he has many pieces. This part here took me around 1 hour. The black wash was done a bit too heavily, but I'll see how the second one comes out. Worst case is I will have to remove the paint of this one and do it over again.
TF2: ROTF a MUST watch!!!
For a better review, check out deSMOnd Collection and The Stormtrooper Effect .
My thoughts: The movie was awesome, there were a lot of action scenes. Soundwave sucked. Sideways sucked even more. What I am most surprised is that Wheelie is some type of Tamiya RC car. Thought he was a Tamiya Hi-Lift F350 at first, the body looks like it was from that, but the axles looked like they were from the TLT. The chassis is definitely not Hi-Lift, it was running some 4-link setup like a crawler. The chassis looked familiar, but I can't recall what it is on top of my head. Lastly Skids and Mudflap were PURE AWESOME!!!
Before the movie, I wasn't that interested in the rotf toy line. I only got Soundwave because he looked cool. Now I want a BB, Skids, and Mudflap!
Tuesday, June 23, 2009
Monday, June 22, 2009
RC updates
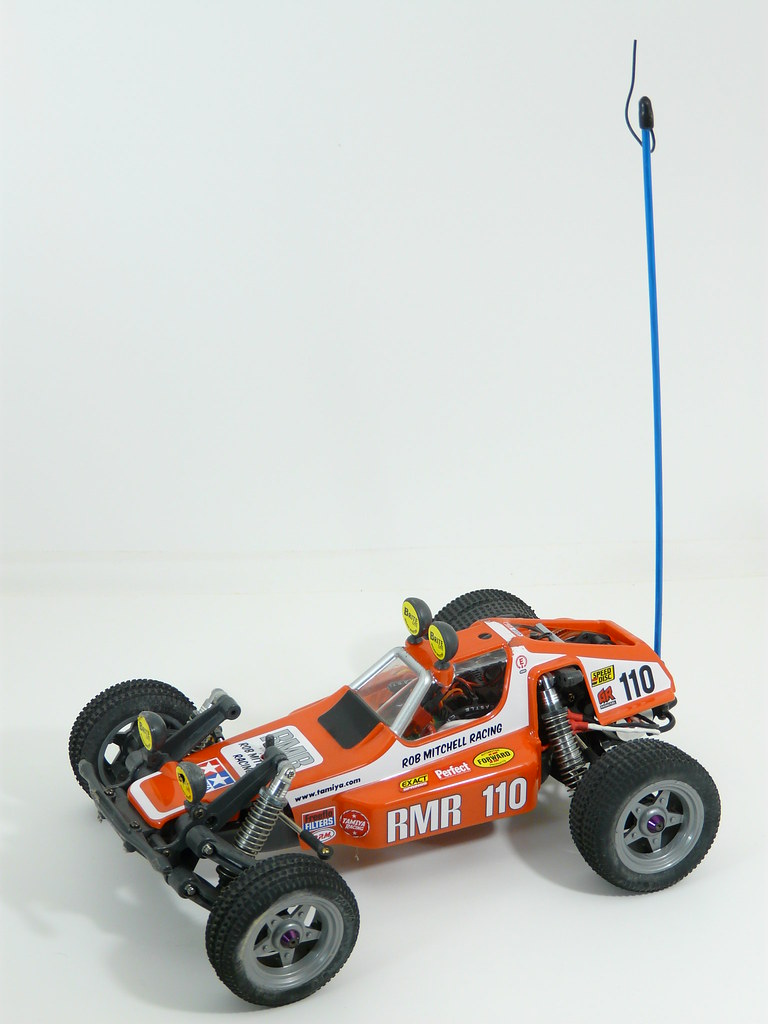
The parts I got last week includes a pinion gear set for my Tamiya Tamtech Buggy Champ. I had a 11T pinion gear on the 9200kv Dynamite C4 motor in this buggy. There was too much torque and not enough speed. So I swapped it up to a 14t and tested it out, the increase in speed was very noticeable, torque was less, but there was still plenty of that to spare. With the increased speed, something was prone to happen and it did after testing the buggy for about 5 minutes. I crashed it into a corner of a curb and broke the rear suspension mount. Now I have to wait for replacement again!
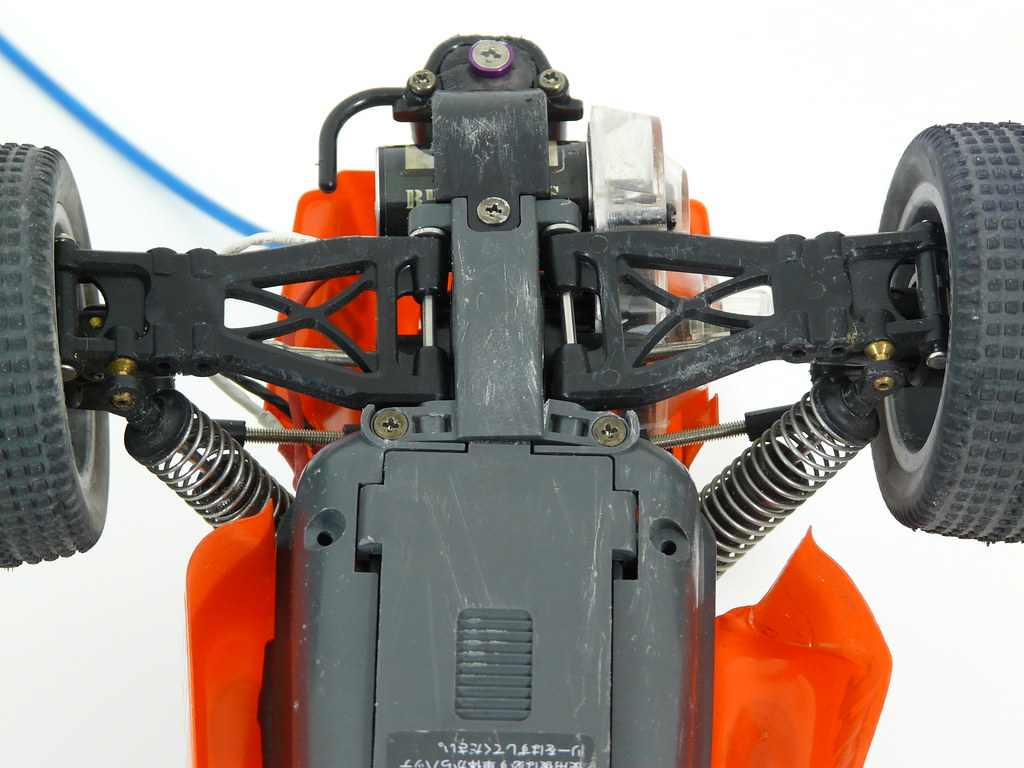
Another thing I noticed was how hot the motor got, it was too hot to touch. So when I get the replacement part for the rebuild, I am going to swap in a 12t pinion instead to slow it down a bit and lower the motor temp.
----------------------------------------------------------------------------------
Last night, I decided to rebuild my Hotbodies Minizilla. It's been sitting around without electronics for a long time. I dug around the workshop and found a set of stock motor and ESC from the Tamtech Buggy Champ above since I changed to a brushless setup. To make a long story short, I was disappointed with the speed, maybe because I am too used to brushless power. The bad thing is that this truck has bad gears that cannot handle too much power, and there is no upgrade to fix that problem. Therefore, I didn't want to put in too much power because another thing is that the parts support for this truck is poor. I am pretty sure this truck is discontinued already.
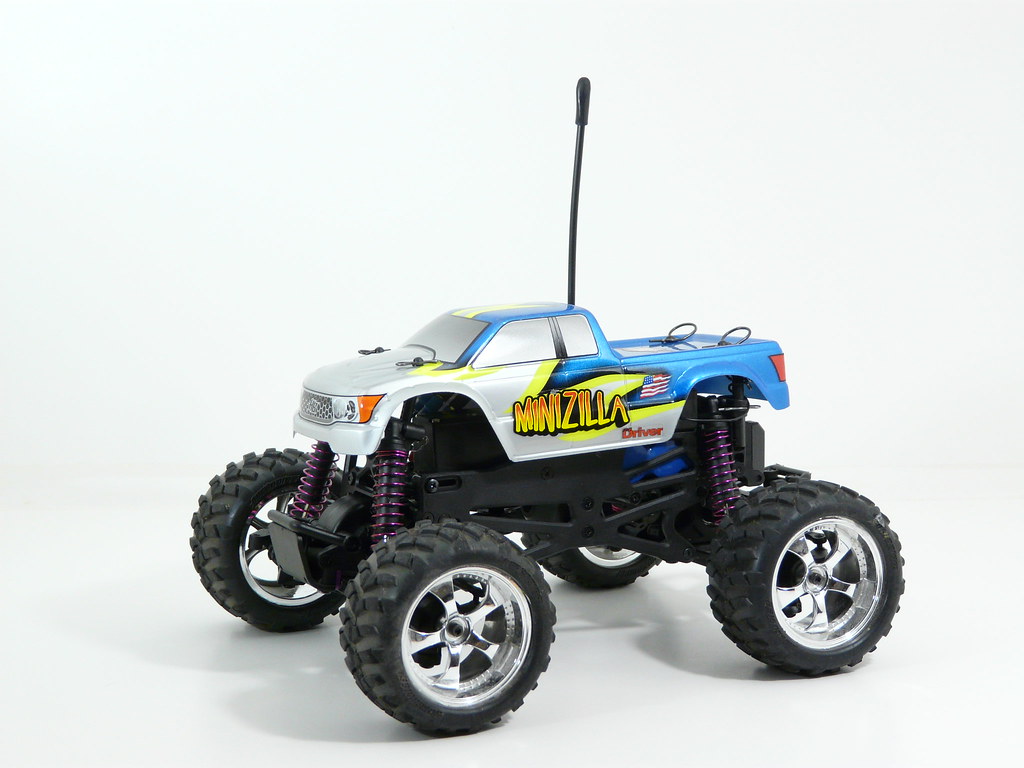
Anyways, after running it for about 30 seconds with the stock motor, I went back to the workshop and look around to see if there would be any suitable replacement. To my surprise, I found a Mamba-25 brushless ESC in a bag beside the track LOL, seems like there are a lot of treasures in my basement. I had a Feigao long can brushless motor that I got a long time ago just for the Minizilla. It is not an insanely fast motor, think it was around 4000kv, but since it's a long can, it has a lot of torque so I can gear it up. I started off with an 18t pinion and boy was it fast! Of course it isn't even close to the 9200kv in my BC, but for this truck, the speed is just right since the center of gravity for this truck is so tall, it rolls really easily.
The fun in this truck, even though it's not as fast, is seeing the suspension push down from side to side during the turns, balancing on the two side wheels during high speed turns, and the occasional rolls and tumbles. However, after running it for about 5 minutes, the motor got really hot, checked it with my temp gun and it was running at 115F! Swapped it to a 16t and motor temp got much better (can at least touch it for a while), speed was decreased, but the torque made it even more fun to drive. It can wheelie and flip backwards from standstill just from the torque. Another thing that I am experiencing with this setup is cogging since I am using a stock battery pack that came with the RTR Losi Mini-LST. Going to order a few better packs soon.
Pure stock truck except for brushless system. Going to add some goodies on this truck later.

Next-up: Losi Mini-LST Rebuild
Saturday, June 20, 2009
Photoshoot: Revoltech Black Ox
(Click pics for enlarge version)
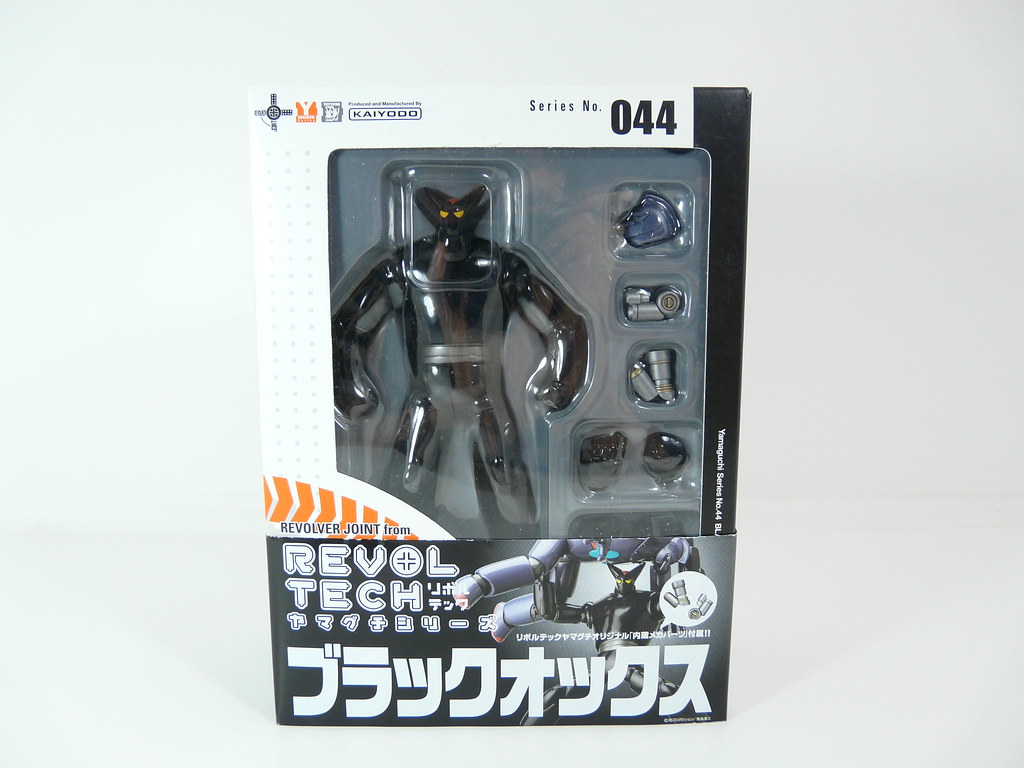
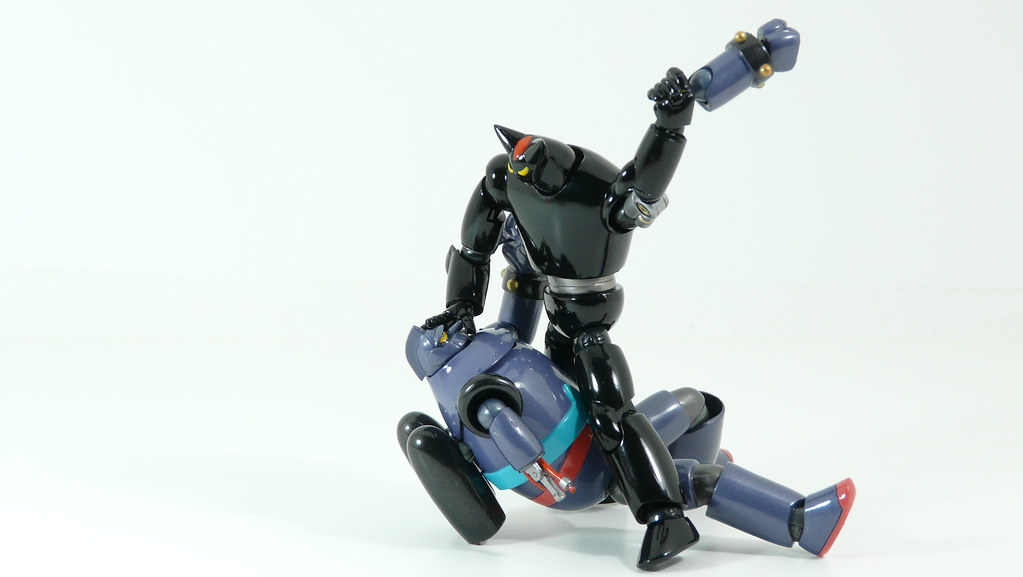
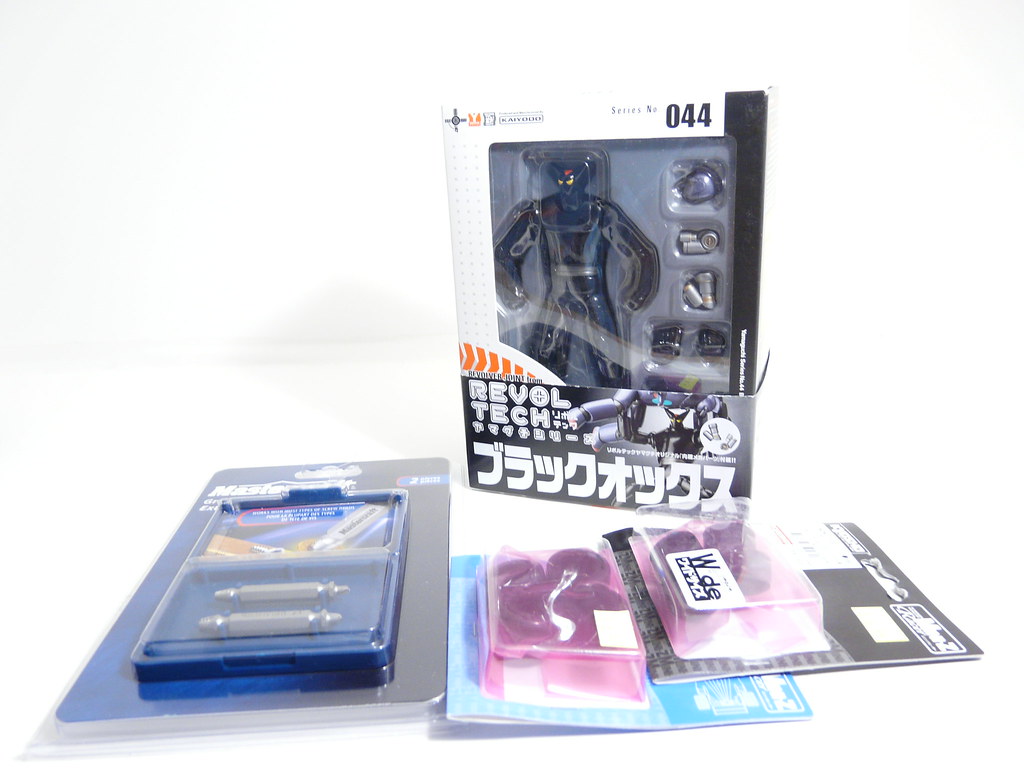
Finally did a photoshoot for my new Revoltech Black Ox figure. This is one of my longer photoshoots, I had a total of 89 pictures from the shoot, but of course only a handful were usable. A majority of the time was spent posing and switching parts on the figure. Revoltechs are good for their poseability, but making them stand by themselves is sometimes a hard task.
First off, let's start off with the mandatory box shots.
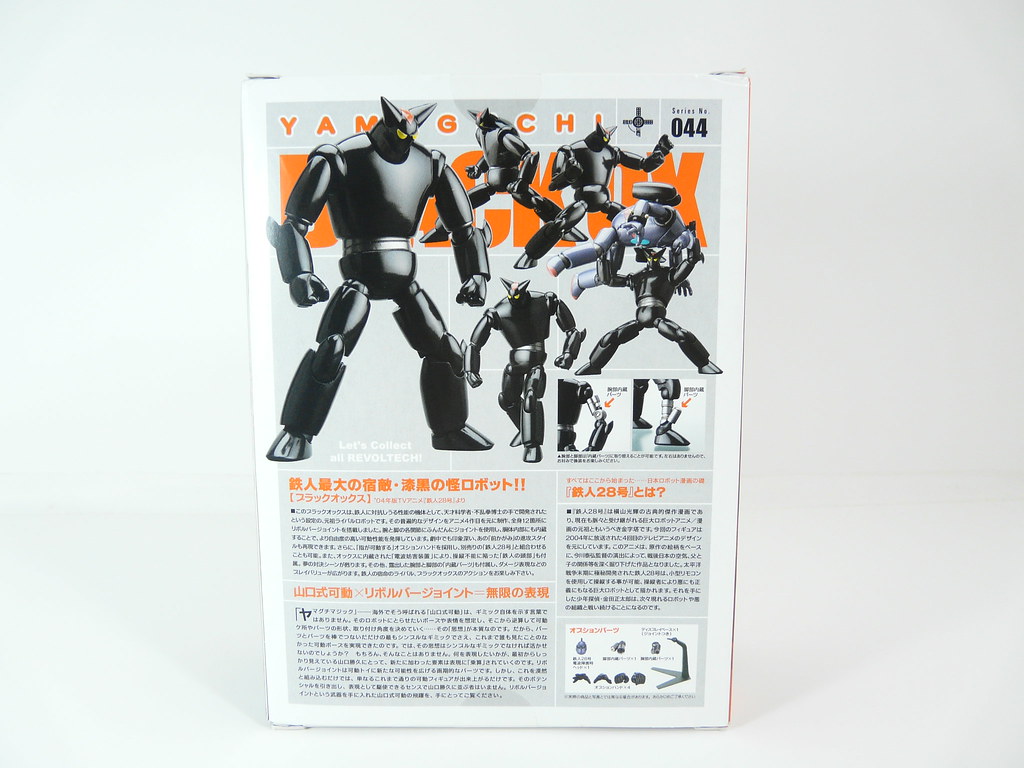
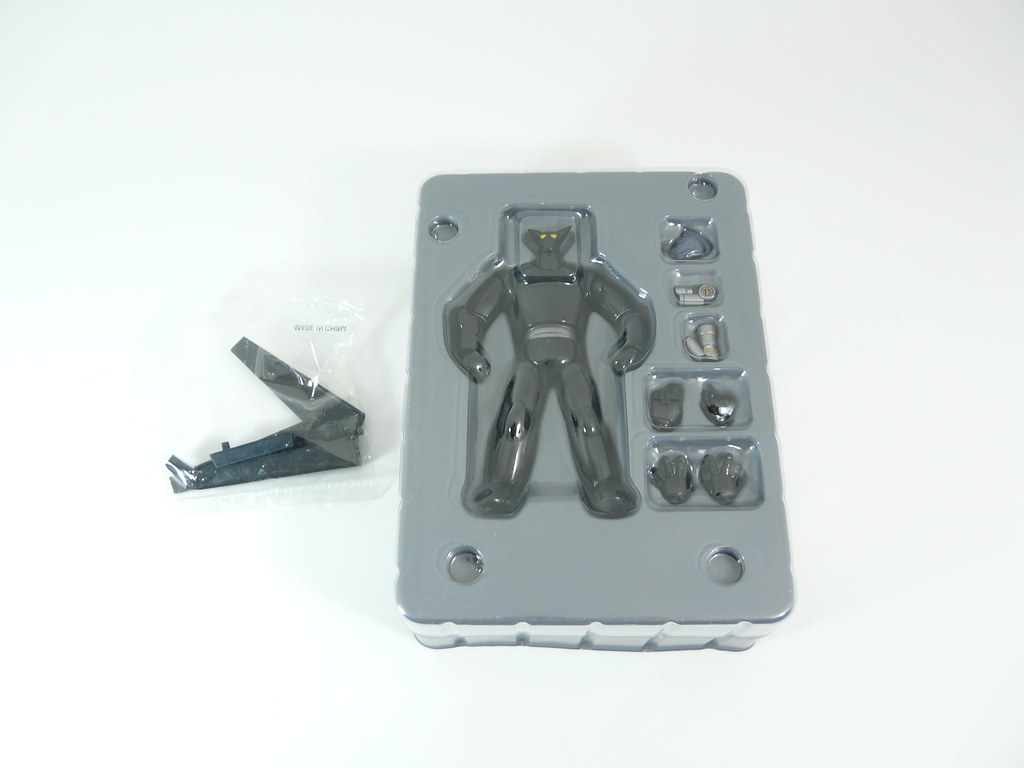
Contents
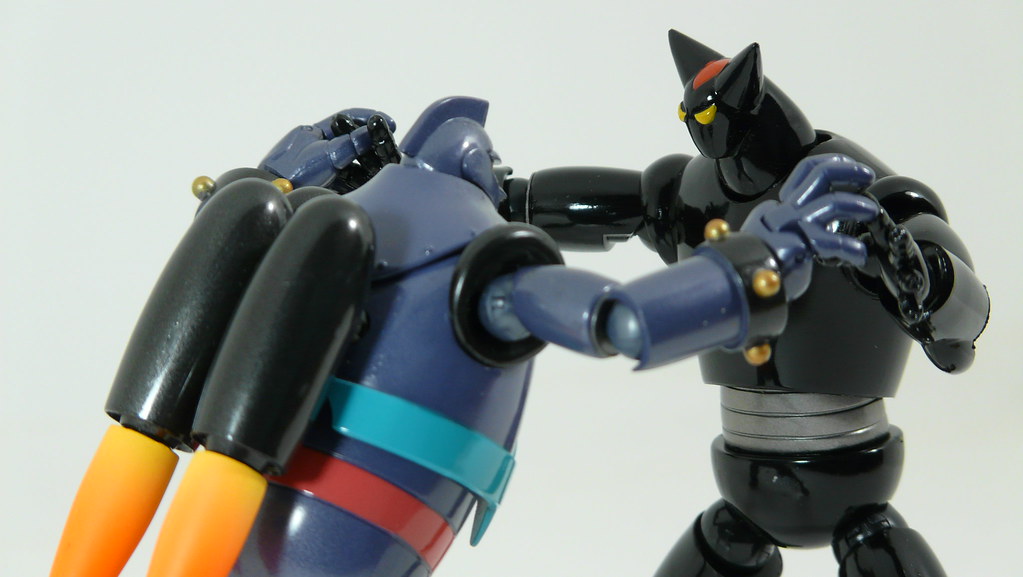
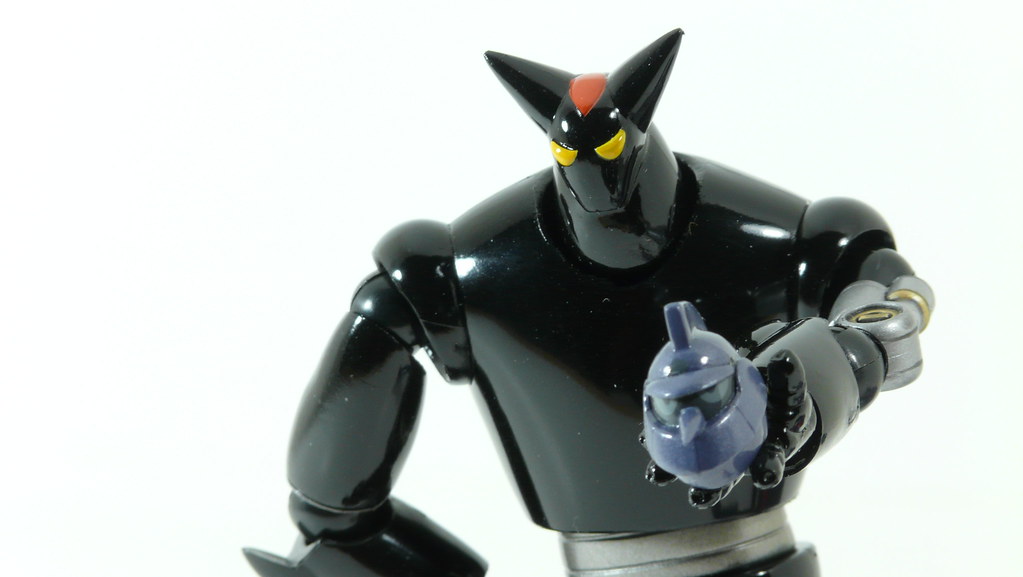
I really like this figure because I have always liked simple designed robots.
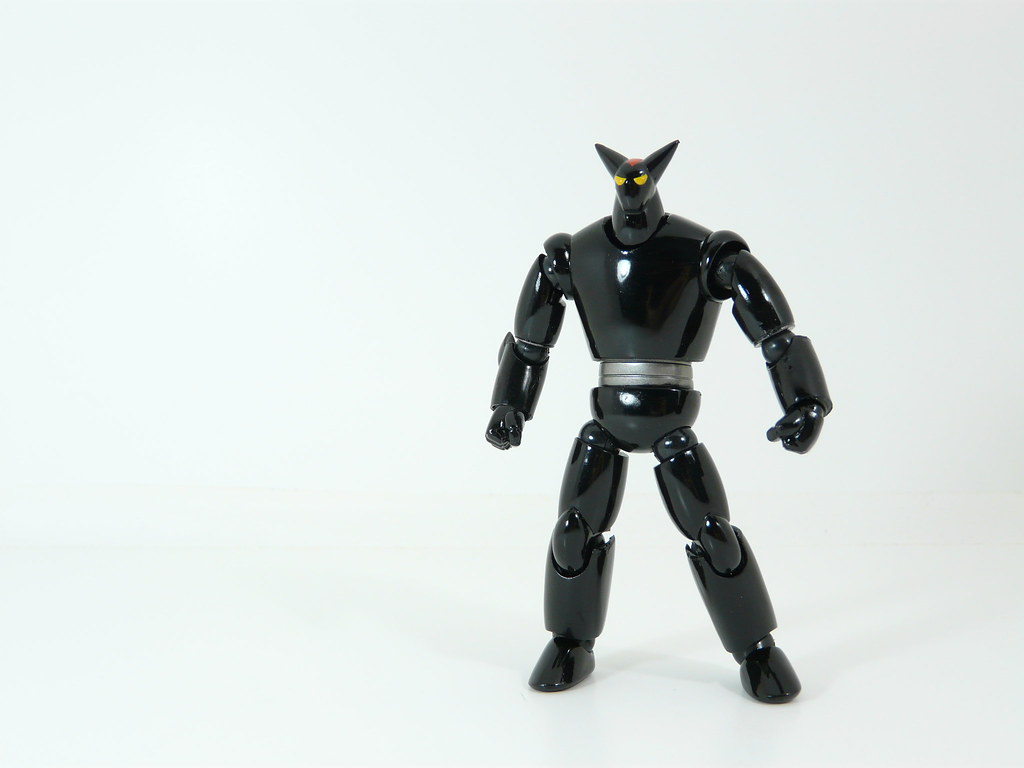
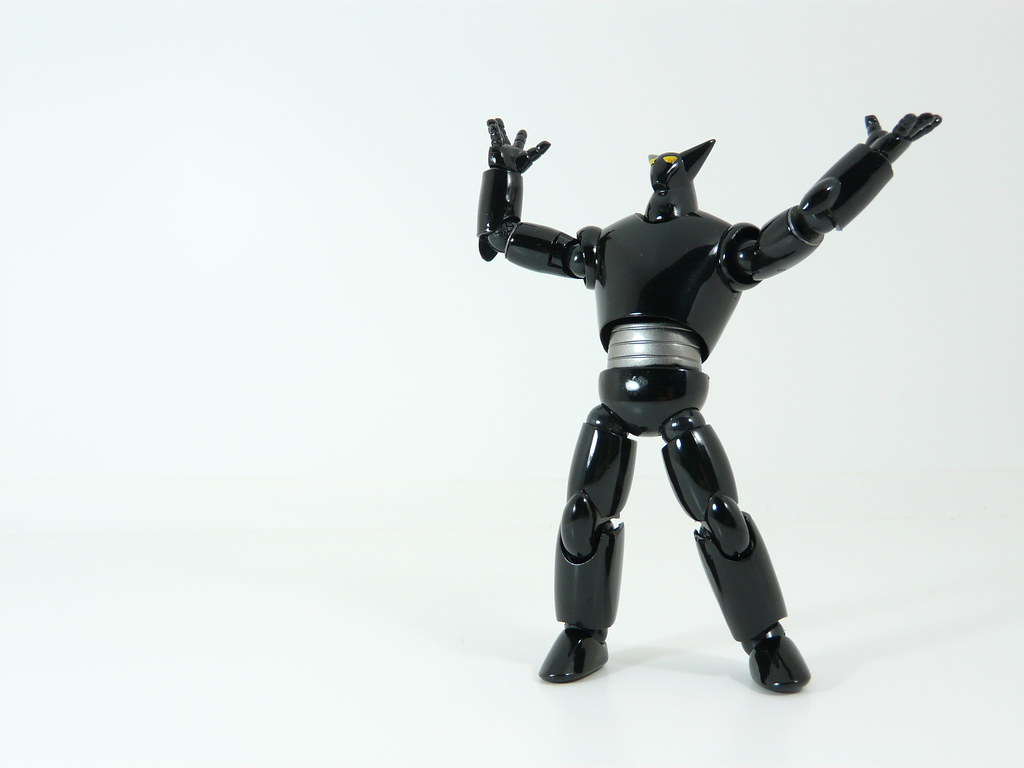
There are not many details on the figure, he's just a sleek black machine.
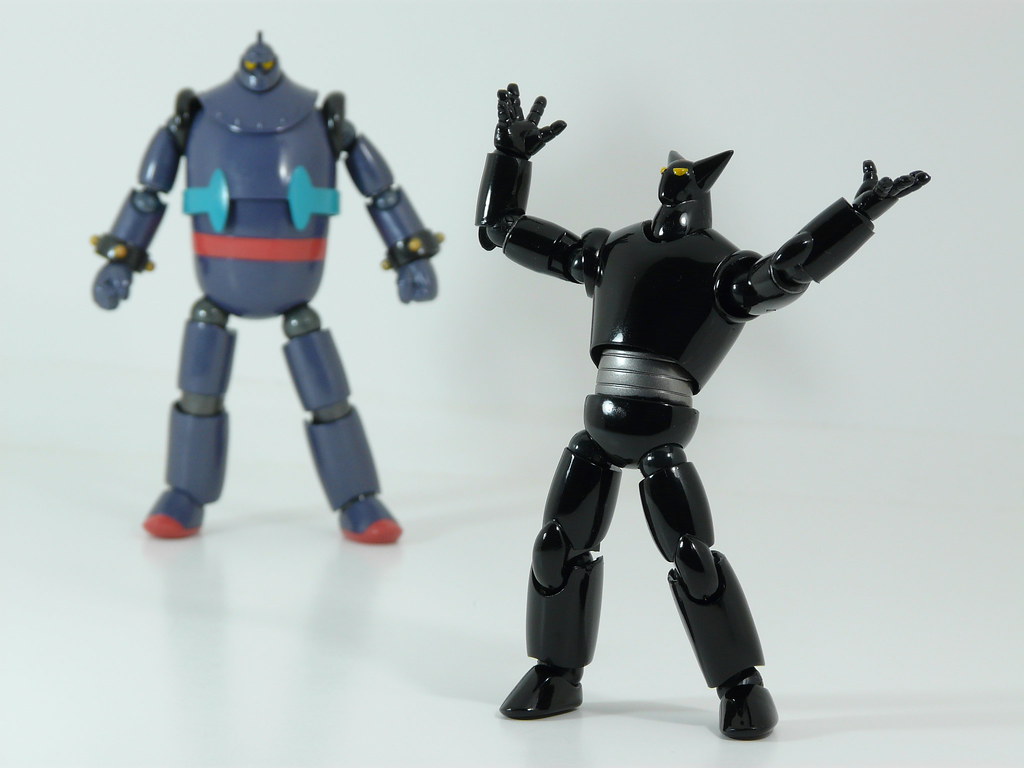
The interesting difference between the Black Ox and T28 are at the hands. The hands on the T28 are attached via mini Revoltech joints. On Black Ox, the hands have pegs which goes into the hole on the wrists. This limits the wrist motion, but I like this way better because it makes switching the hands much easier.
Articulation wise, it is the same as T28 with the exception of the hand/wrist joint as stated above.

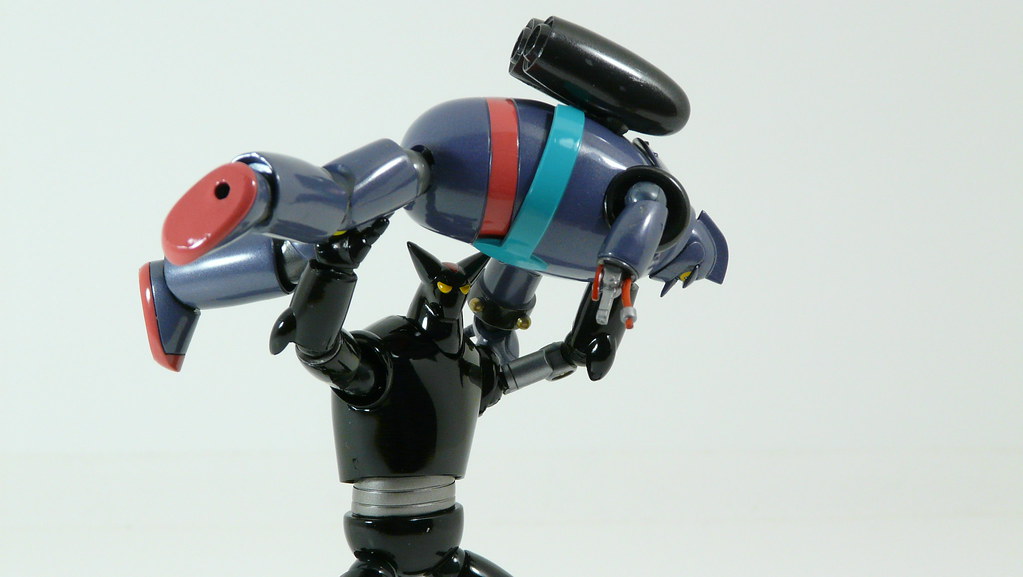
Black Ox is very strong...
Jet-pack power!
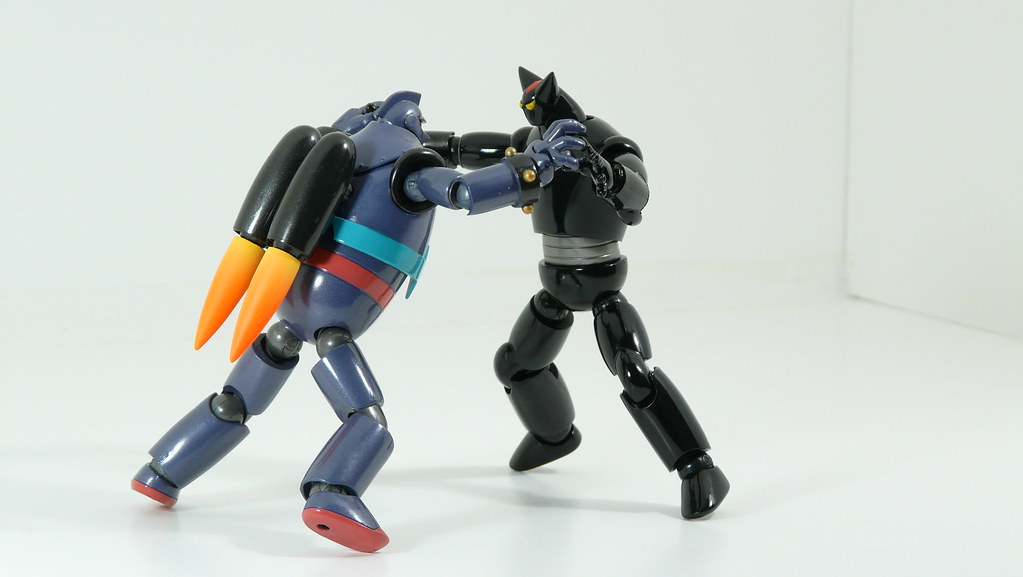
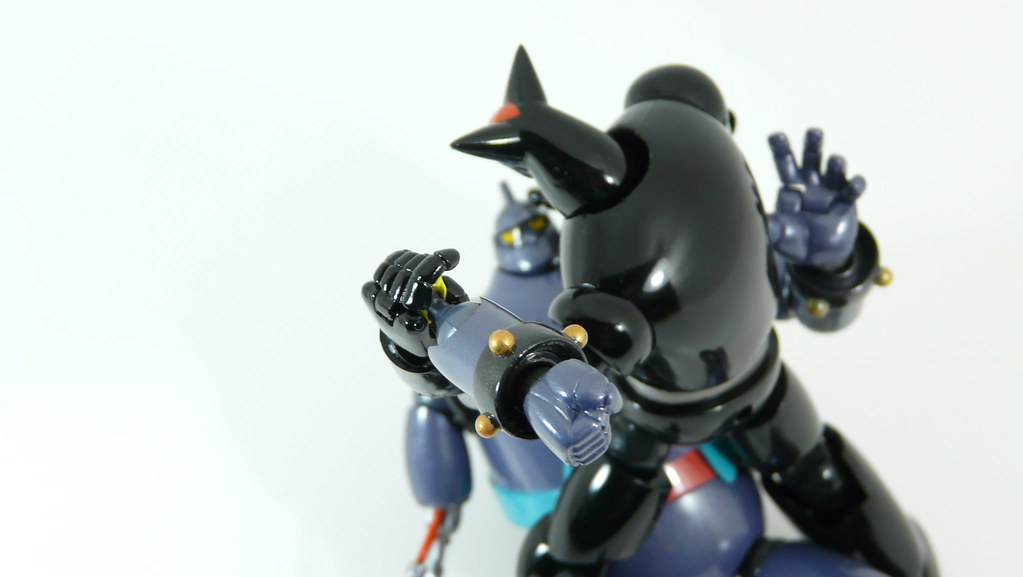
Can see how serious they look...

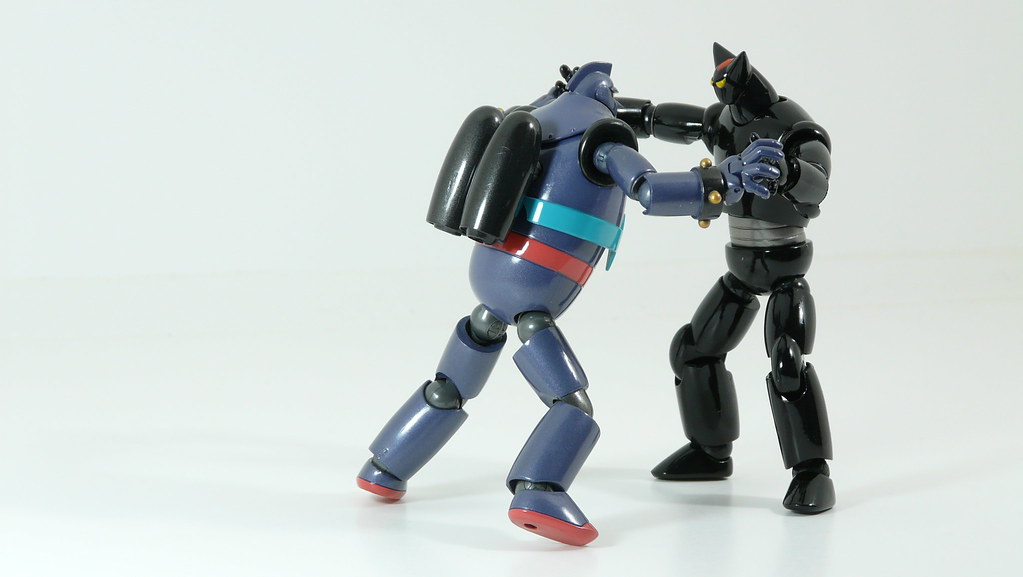
The following contents may contain violence and partial robot nudity. Parental discretion is advised.
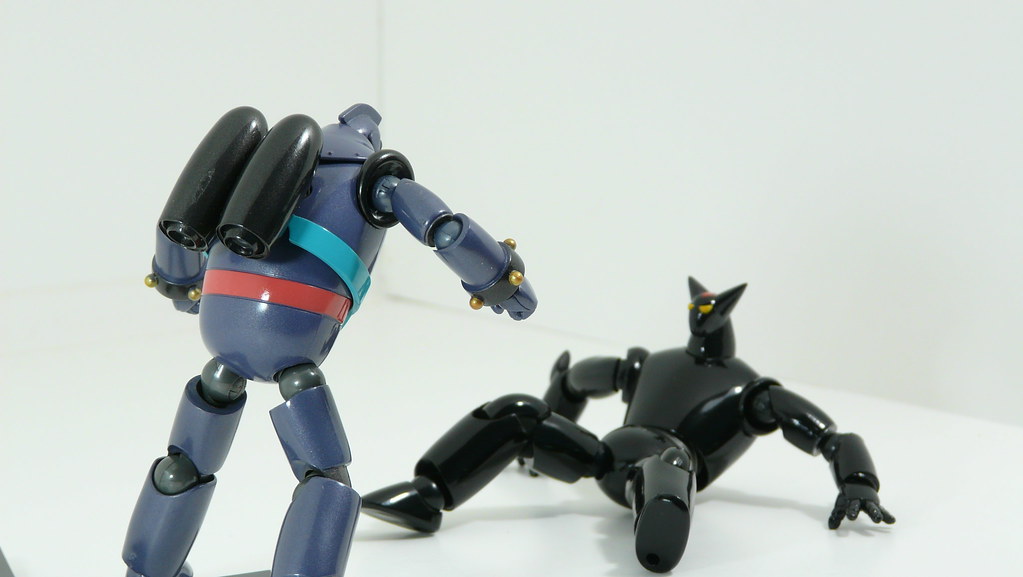


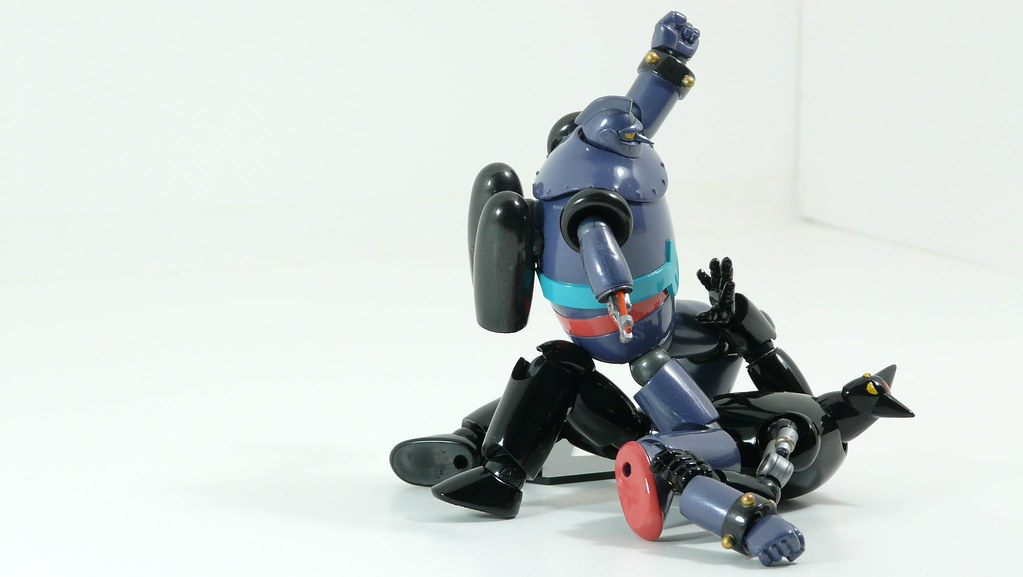


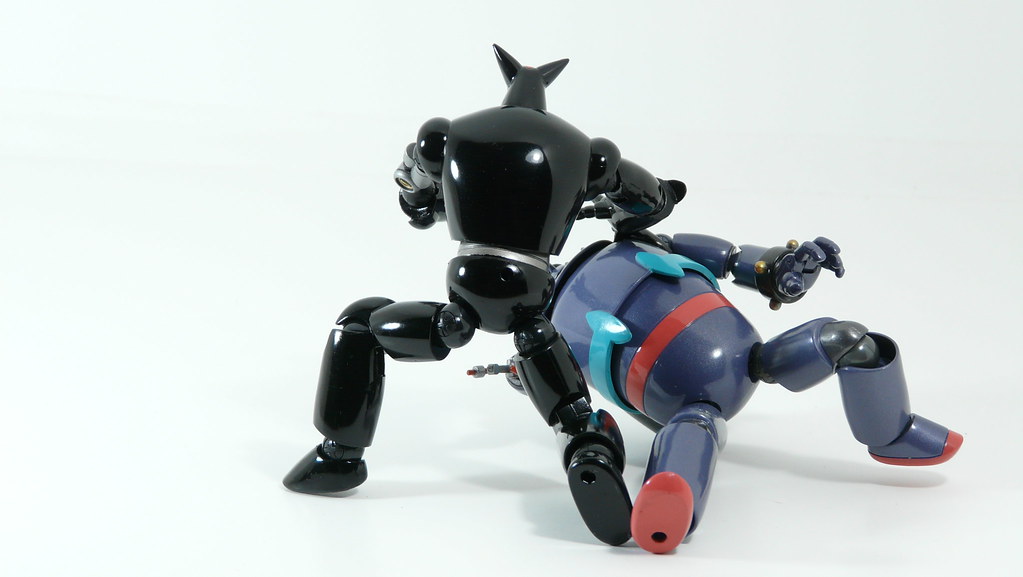
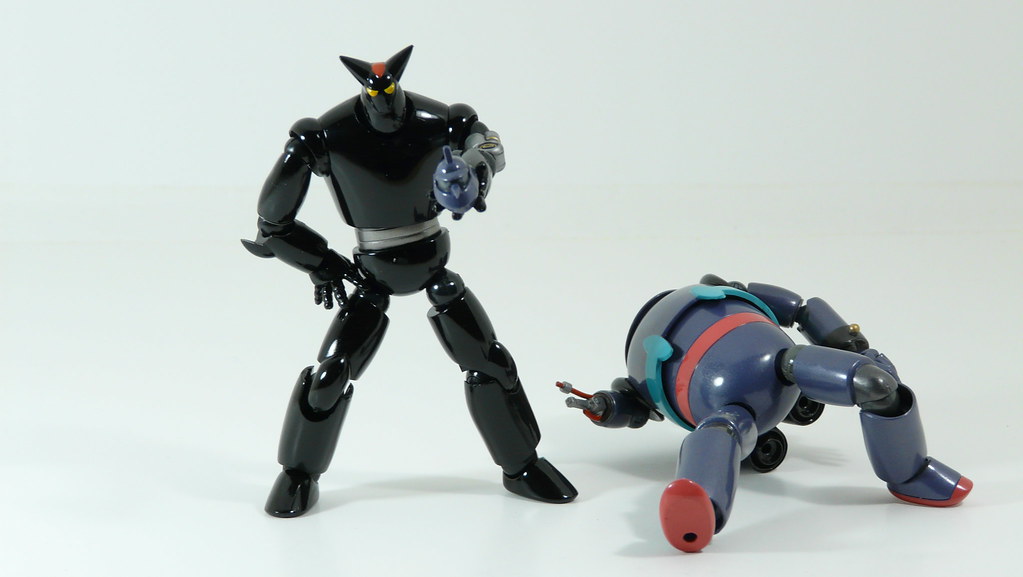
K.O.!
Well that's the end of the shoot. This one had more violence than any other of my shoots. But all the exposed robotic pieces were just begging to be in the shoot too. The only one I didn't get to use was the leg piece on the Black Ox because I couldn't pull the Revoltech joint out of the original piece.
Anyways, this figure is a MUST-GET for those who already have T28 and is thinking about this one, or just anyone that likes the design of this robot!
You can check out my Revoltech Tetsujin-28 review here.
Finally did a photoshoot for my new Revoltech Black Ox figure. This is one of my longer photoshoots, I had a total of 89 pictures from the shoot, but of course only a handful were usable. A majority of the time was spent posing and switching parts on the figure. Revoltechs are good for their poseability, but making them stand by themselves is sometimes a hard task.
First off, let's start off with the mandatory box shots.
Contents
I really like this figure because I have always liked simple designed robots.
There are not many details on the figure, he's just a sleek black machine.
The interesting difference between the Black Ox and T28 are at the hands. The hands on the T28 are attached via mini Revoltech joints. On Black Ox, the hands have pegs which goes into the hole on the wrists. This limits the wrist motion, but I like this way better because it makes switching the hands much easier.
Articulation wise, it is the same as T28 with the exception of the hand/wrist joint as stated above.
Black Ox is very strong...
Jet-pack power!
Can see how serious they look...
The following contents may contain violence and partial robot nudity. Parental discretion is advised.
K.O.!
Well that's the end of the shoot. This one had more violence than any other of my shoots. But all the exposed robotic pieces were just begging to be in the shoot too. The only one I didn't get to use was the leg piece on the Black Ox because I couldn't pull the Revoltech joint out of the original piece.
Anyways, this figure is a MUST-GET for those who already have T28 and is thinking about this one, or just anyone that likes the design of this robot!
You can check out my Revoltech Tetsujin-28 review here.
Friday, June 19, 2009
Received a package today
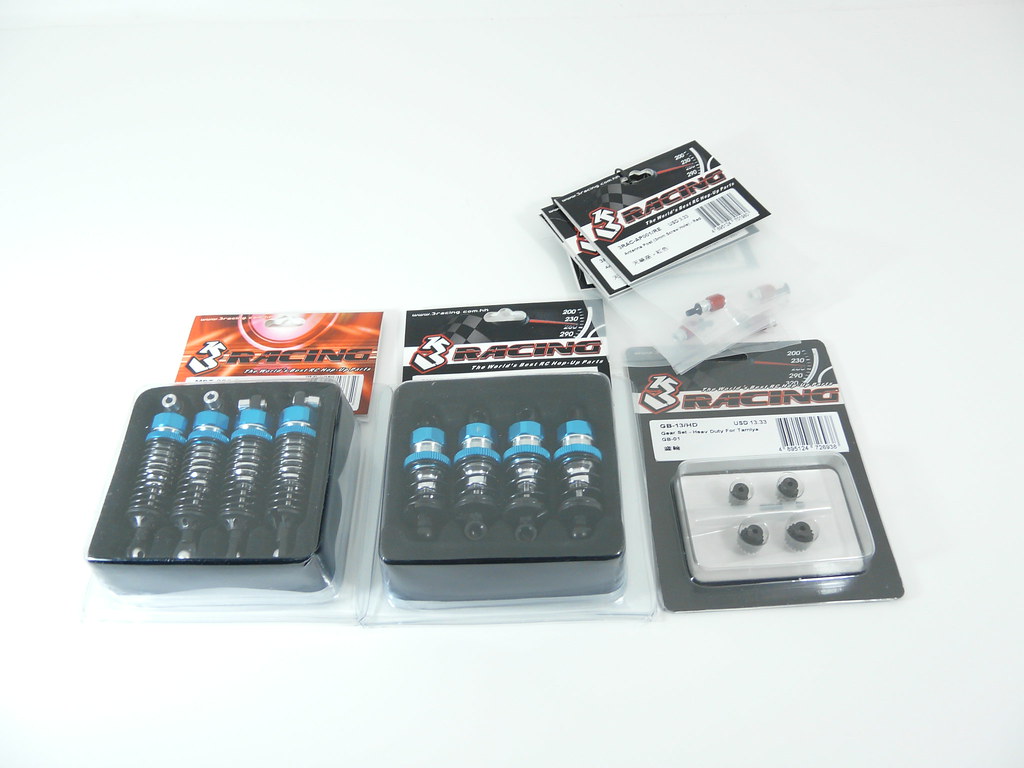
...from Stellamodels containing some RC parts I ordered. I ordered and paid for it on June 8 (used airmail shipping method, cheapest) and got the package today on the 19th. Not bad.
On the other hand, I have a small order that I placed on June 3rd from Dealextreme and I checked the status of my package on their website today and it is still "Packaging". However, I've ordered from them before and it arrived in 2 weeks time. So I am guessing an item in this order might be out of stock or something so it's taking longer.
Anyways, here's what I got from Stella today. Too bad I forgot to order the alloy Kyosho HOR gearbox I needed. Probably going to place another order this weekend.
This week...
I have been chasing this chinese drama that's why I haven't been updating the blog. I just finished it so it's time for some blogging!

Saturday, June 13, 2009
Haul of today
Finally! My T-28's arch enemy is here! Will do a photoshoot of it with T-28 tomorrow. I got two sets of tires for my Mini-Z's (RC cars), one for the road car (Ferrari FXX) and the other for the F1. F1 parts are hard to come by because they are not very popular here, so the tires were a good find, especially since they are a soft racing compound.
Got some tools too, related to RC's for my use, so it's in the haul haha. Got a 17mm socket for my nitro car wheel nuts from the hardware store for $4. I was at a hobby shop earlier looking for a 17mm wrench and found that they were $30! That's $26 saved right there. Some stuff in RC's can actually be found commonly, but the RC industry overprices them way too much. The other tool set is a MasterCraft GraBit. It is used to remove screws with damaged screw heads.
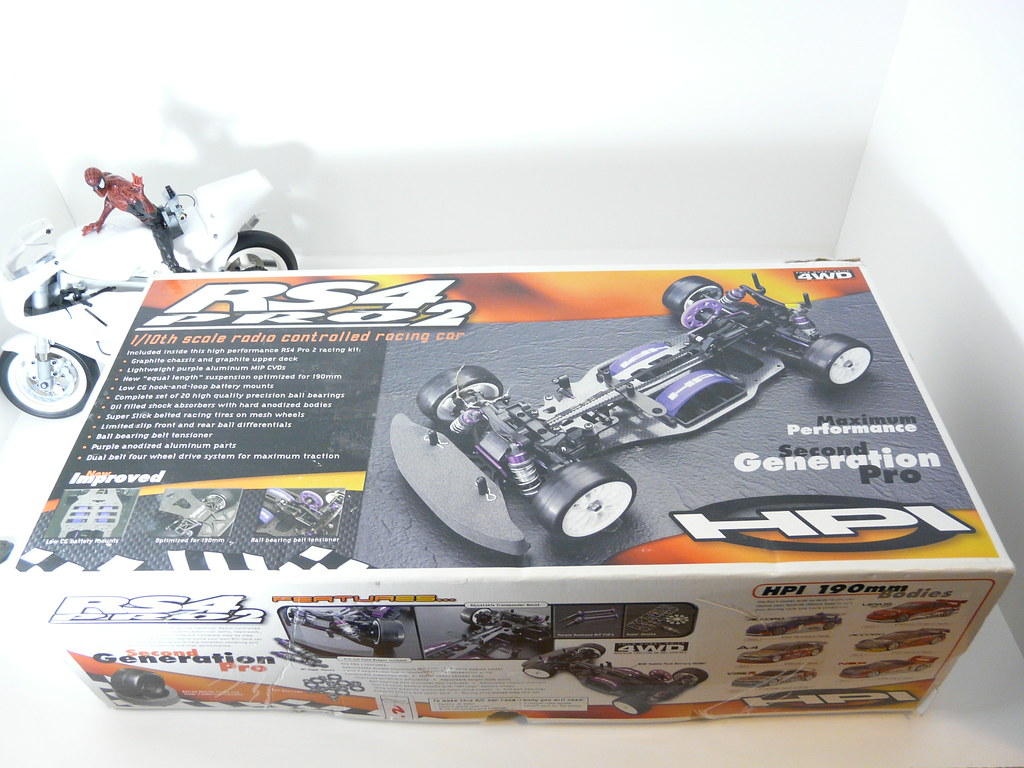
Another RC project I am currently working on is a HPI RS4 Pro 2 onroad chassis. It is a vintage chassis that no longer has any part support. I am not exactly sure when it was released, but I remember seeing it in a magazine when I got my first RC, I think around 9 years ago. But at that time, the chassis was considered as a top of the line professional racing chassis and I remember it was going for about $400 for just the chassis alone. At the age, I of course could not afford it. Fast-track to about 5 years later, I was in a checking out a hobby shop and saw someone bring this kit in for consignment. I purchased it on the spot, not risking to lose another opportunity.
The chassis is in alright condition, just in need of some cleaning. But some screws in the chassis have ruined screw heads and hence I need this GraBit kit to remove them.
Oh ya and of course I got the paint needed for the Kyosho HOR!
Friday, June 12, 2009
Kyosho HOR: Suzuki RGV-T (Part 4)
Finally finished up the bike today, decided to just build the rider and put it all together before painting. The only thing is I made the mistake of using a drill press for the mounting holes on the rider's visor, result was ripping the piece right off. The good thing is the visor is just thin lexan, so it is easy to cut another piece. The bad thing is the original visor is ripped on one side, so I can't trace the whole thing.
Meeh...I'll think of something later...
Next, I think I'll start planning the colors...
Meeh...I'll think of something later...
Next, I think I'll start planning the colors...
Wednesday, June 10, 2009
Kyosho HOR: Suzuki RGV-T (Part 3)
Today, I continue with the gearbox part of the bike. I decided to leave the bearings out of this step because they were a tight fit in the plastic gearbox. Since I might upgrade to an alloy gearbox later, I figured I'd just keep the bearings for later instead of risk damaging them when I pry them out of the plastic one when I make the switch. The problem with this is I ended up putting in a Mamba 8000kv brushless motor in the bike. I originally had the stock motor installed. But I wanted to use the Mamba-25 ESC (for the ease of switching to brushless later). I found out that Castle Creations released a firmware update for the Mamba-25 which makes it compatible with brushed motors, but the wiring configuration requires me to modify my existing one, so I decided to just go straight to brushless.
Now I know that something will probably in the drivetrain with go BOOM if I run the bike at its current state. So I plan to upgrade it before I run it. Anyways, enough about the drivetrain, I'll worry about that later.
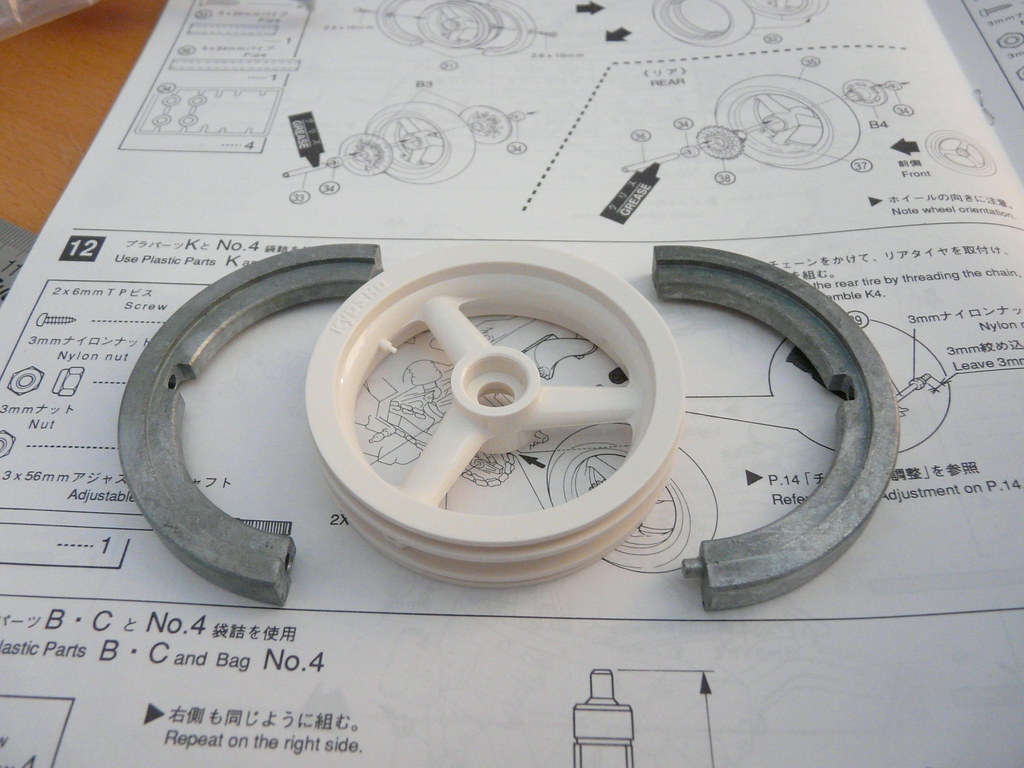
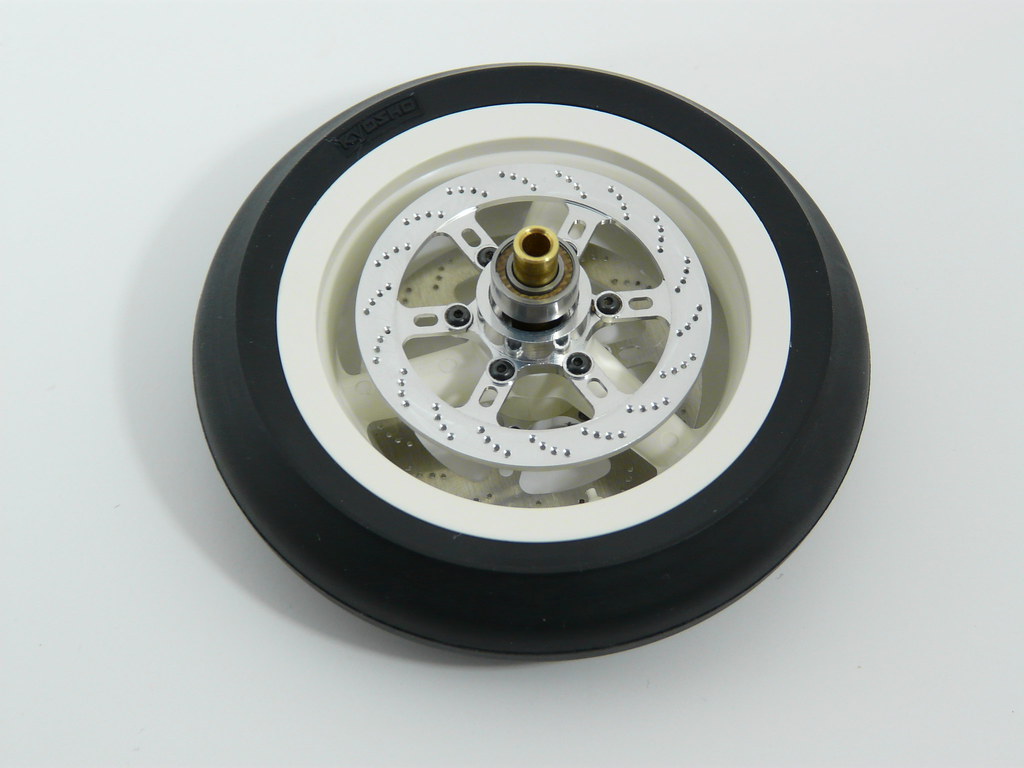
Next step are the wheels. The front wheel is loaded with metal weights, I guess it helps with leaning the bike since the servo only controls the rider. I'll get back to this when I actually run the bike.
Finally it's the brake disks installation step. These brake disks are just for looks, they are not functional. However, I believe there are mods which adds functional disk brakes to this bike. Instead of the gray stock plastic pieces, I opt for the 2-piece aluminum pieces from Rogue Element Components.
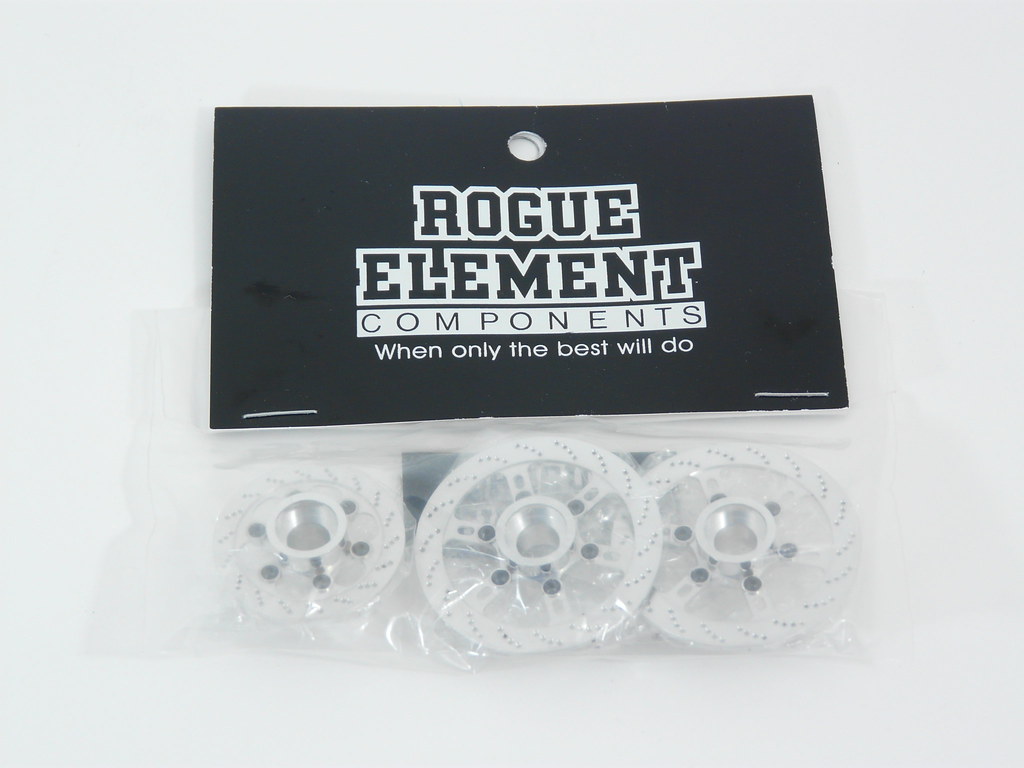
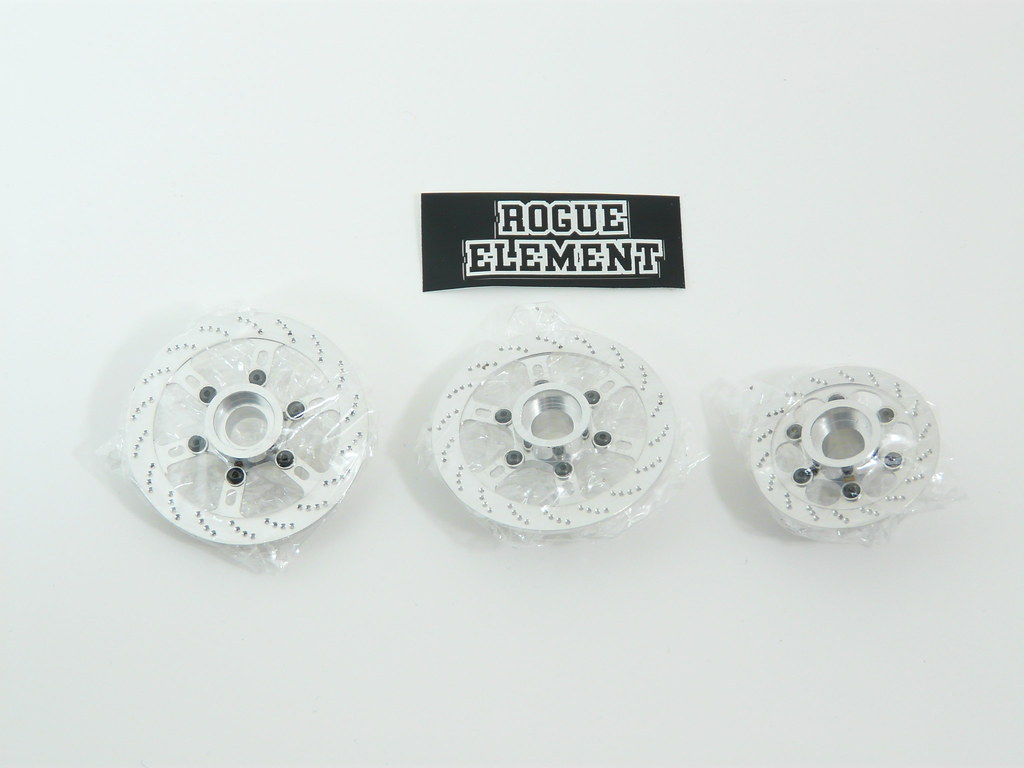
Each disks comes individually wrapped. The face side of the disks are polished to a shiny finish and the back side is machined finish (the back side is not really visible on the bike, so it doesn't really matter). Each unit is 2-piece consisting of the disk itself mounted onto the hub via six tiny hex screws.
These pieces look DROOL-tastic mounted on the wheels. I want some black alloy wheels to go with these. The disks look so beautiful, like a piece of jewelery. I left the titanium sprocket out for now, it's going to be installed along with the rest of the drivetrain upgrade.
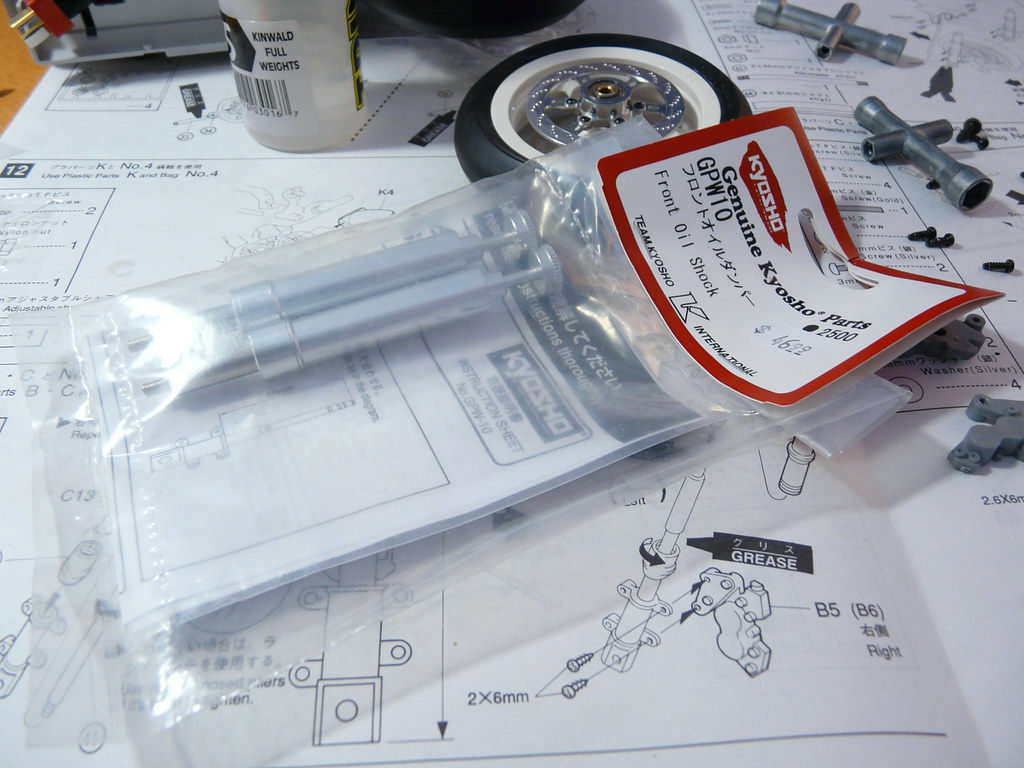
The next part of the build is the front forks. The stock units are spring loaded, I went with the Kyosho oil-filled units. In the first post, I had shown the Kyosho unit pre-built, that one was built by my dad. As I know him, he probably built it wrong because gobs of oil was leaking out of it. So I decided to build a new set, it took some time to get right, but it's leak-free now.
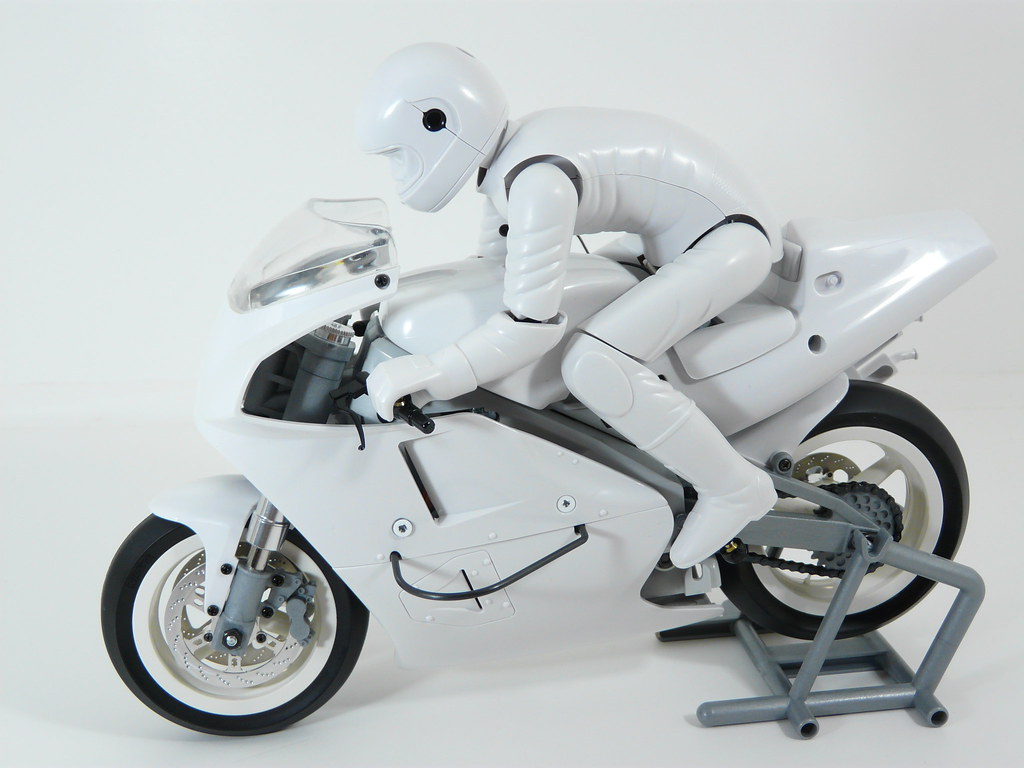
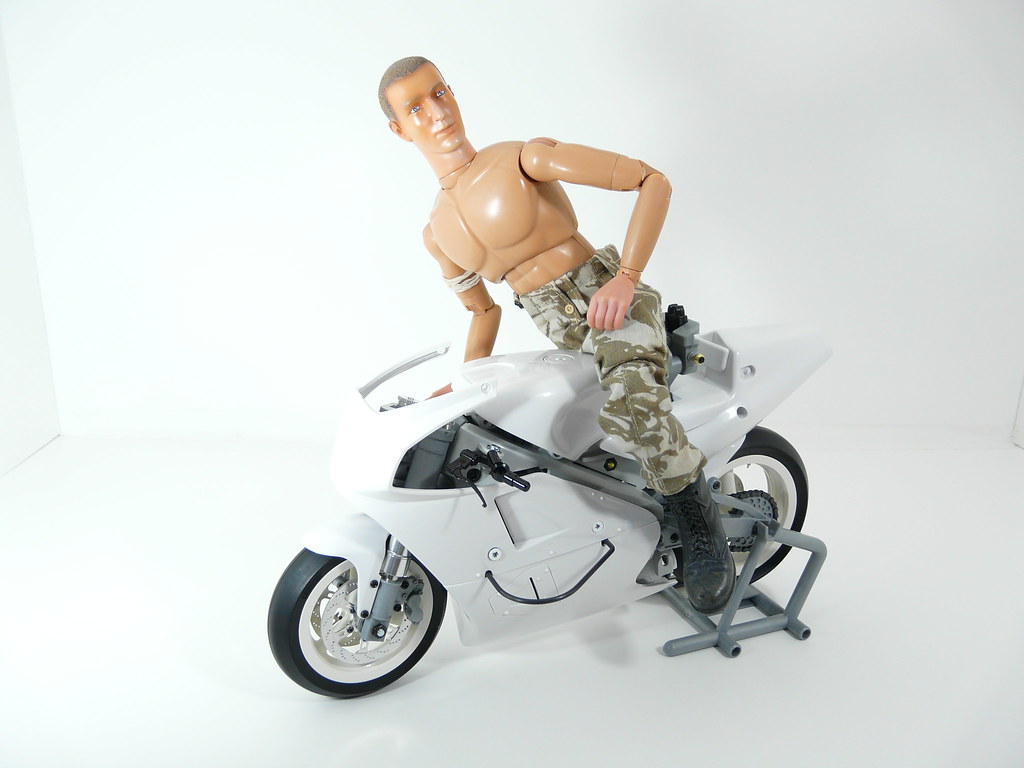
The bike is almost complete. Only thing remaining is the rider figure. I am planning to take it apart after I finish for the painting and the drivetrain upgrade.

Testing out the bike with a 1:6 figure. I think he looks a bit big on the bike. The weird thing is that the kit rider's head is almost the same size as this figure.
(Why is he topless? Just thought he wouldn't look good with army attire on a sports bike.)
Spiderman wanted to try too.
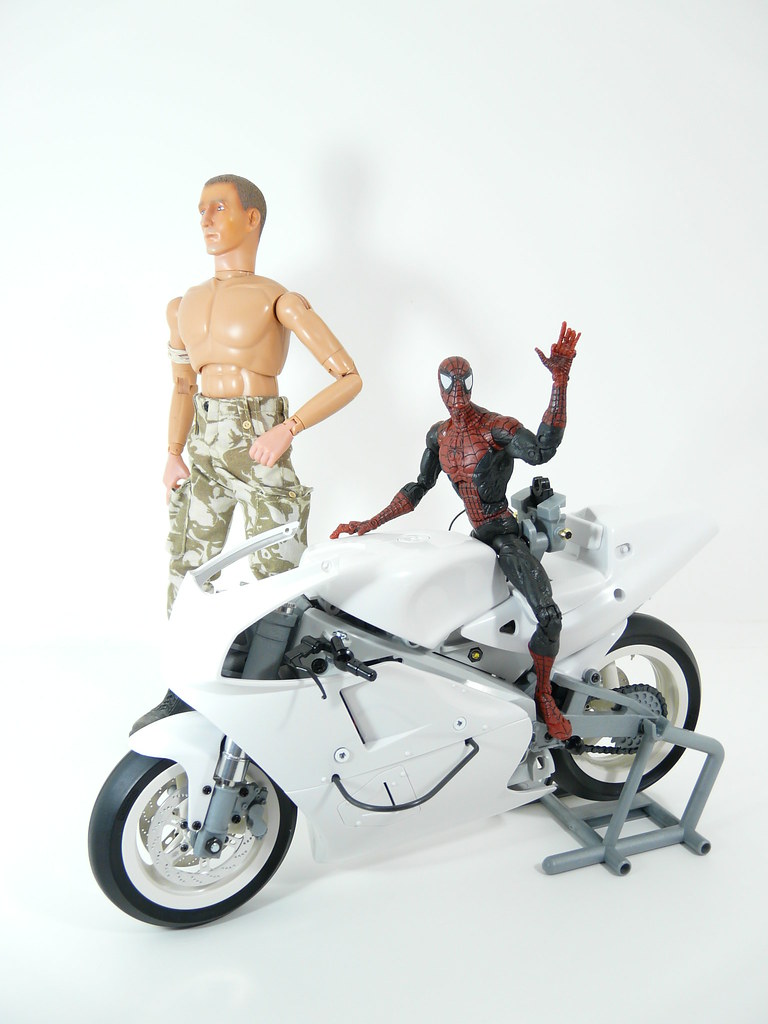
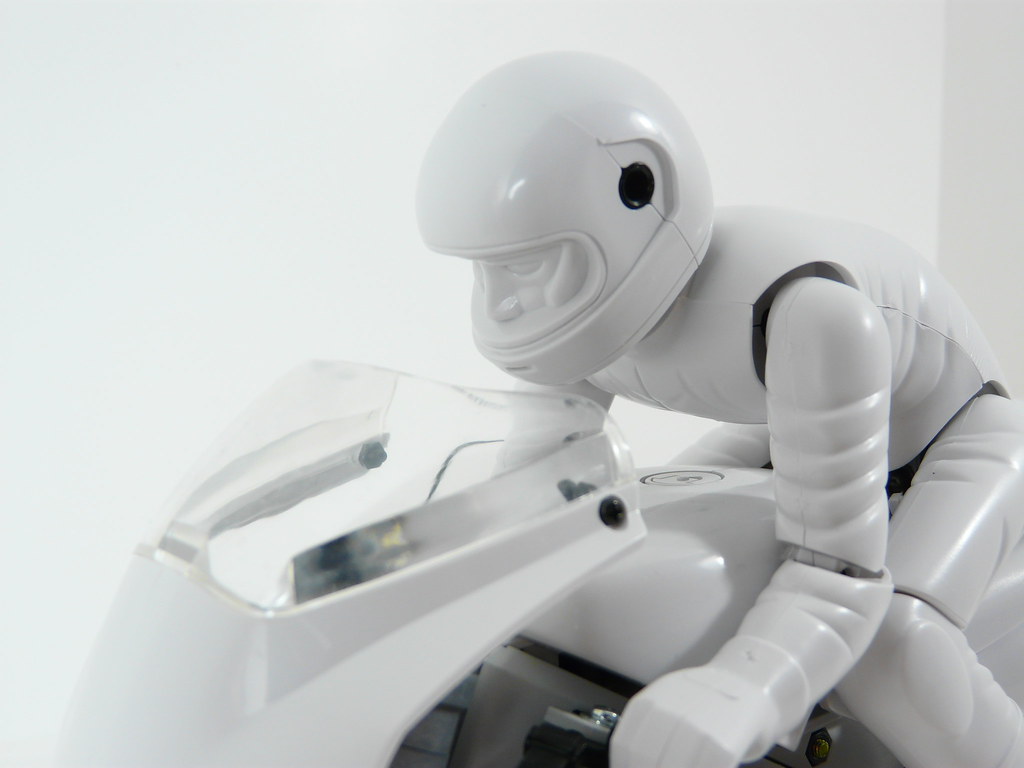
And just a final one with the front glass installed.

Now I know that something will probably in the drivetrain with go BOOM if I run the bike at its current state. So I plan to upgrade it before I run it. Anyways, enough about the drivetrain, I'll worry about that later.
Next step are the wheels. The front wheel is loaded with metal weights, I guess it helps with leaning the bike since the servo only controls the rider. I'll get back to this when I actually run the bike.
Finally it's the brake disks installation step. These brake disks are just for looks, they are not functional. However, I believe there are mods which adds functional disk brakes to this bike. Instead of the gray stock plastic pieces, I opt for the 2-piece aluminum pieces from Rogue Element Components.
Each disks comes individually wrapped. The face side of the disks are polished to a shiny finish and the back side is machined finish (the back side is not really visible on the bike, so it doesn't really matter). Each unit is 2-piece consisting of the disk itself mounted onto the hub via six tiny hex screws.
These pieces look DROOL-tastic mounted on the wheels. I want some black alloy wheels to go with these. The disks look so beautiful, like a piece of jewelery. I left the titanium sprocket out for now, it's going to be installed along with the rest of the drivetrain upgrade.
The next part of the build is the front forks. The stock units are spring loaded, I went with the Kyosho oil-filled units. In the first post, I had shown the Kyosho unit pre-built, that one was built by my dad. As I know him, he probably built it wrong because gobs of oil was leaking out of it. So I decided to build a new set, it took some time to get right, but it's leak-free now.
The bike is almost complete. Only thing remaining is the rider figure. I am planning to take it apart after I finish for the painting and the drivetrain upgrade.
Testing out the bike with a 1:6 figure. I think he looks a bit big on the bike. The weird thing is that the kit rider's head is almost the same size as this figure.
(Why is he topless? Just thought he wouldn't look good with army attire on a sports bike.)
Spiderman wanted to try too.
And just a final one with the front glass installed.
Subscribe to:
Posts (Atom)