Today is the last day of 2011 and it has been a great year overall. My collection has greatly increased this year due to my now steady flow of income and I am grateful for that. I've been thinking a lot lately on the directions I want to take for my toy collecting hobby. I have decided to focus on collecting Transformers mainly with a mix of NECA Predators and Japan Imported Tokusatsu stuff here and there (I am looking forward to the rest of the Ultra brothers and the Dragon Ball Z figures!!!). Hopefully by doing this, I will cut down on my spending this year as I do admit I have splurged on quite a lot of toys lately. Hopefully with the saved money, I can go on some vacations this year as I really need a break from work.
Here's me wishing a Happy New Year to all my friends out there! And may we all have a great 2012 with tons of toys LOL!!!
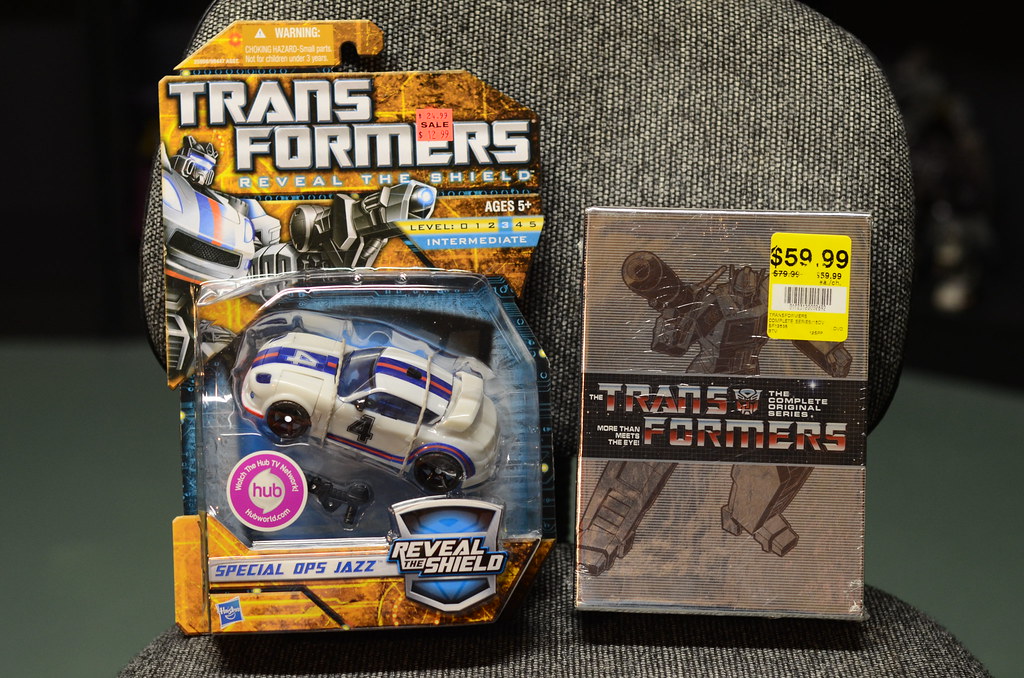
Oh ya and I can't forget my last haul of the year that I scored today!
RTS Jazz is the last TF in the classics line that I need for my Classics collection. I've been buying a ton of these lately due to all the sales we've been having and I've built up quite a nice display after opening them during the Christmas break. I've been hunting for this TF for a while and have visited several stores only to come home empty handed. I didn't expect to find this where I did today, but what a great surprise! And as a Transformers fan, I feel that I just have to watch the Transformers G1 series so I picked up the boxset from HMV today as well.
Saturday, December 31, 2011
Tuesday, December 27, 2011
Review: Mega Bloks Power Ranger Samurai Megazord
Here's my review of the Mega Bloks Power Ranger Samurai Megazord I got last week.
First off, this is my first ever Mega Bloks set. I've always had Lego and had the mindset that anything else is just not as good. Mega Bloks was one of the brands that I avoided since I've always hear bad things about their sets, like missing pieces and poor fitting of the pieces. Therefore I was a little worried when I started to build this set. Let me just clear this up right off the bat, there were no missing pieces at all and the pieces fit together as good as Lego pieces, so there's no worry there.
Since I haven't build a Lego set in ages, I don't remember if they packaged their pieces according to the building steps or not. Most of the "kits" that I've been building in the last ten years were radio control model kits and most of them have pieces packaged in separate bags with letters on them so you can identify which parts came from with bag since some of the kits can contain thousands of parts. This is the first thing I noticed with this set, the pieces seem to be randomly packaged with no labels. The only separation was the bag containing the unique pieces like the zord heads and minifig. I ended up just dumping everything into two separate plastic tray.
The instructions were clearly laid out. There were several mistakes in them, mainly the steps to build the green leg, but they were easy to figure out. (Step C6 uses black 2 unit block, but picture shows green one used, there are no more green ones. And the sticker for the green leg goes on the other face of the leg.)
This is the only shot I got of my building process, finally a use for those plastic Transformers packaging!
Building time took about 40 minutes, most of the time was spent looking for the right pieces. Building is relatively easy, anyone within the age range should have no problem (5+).
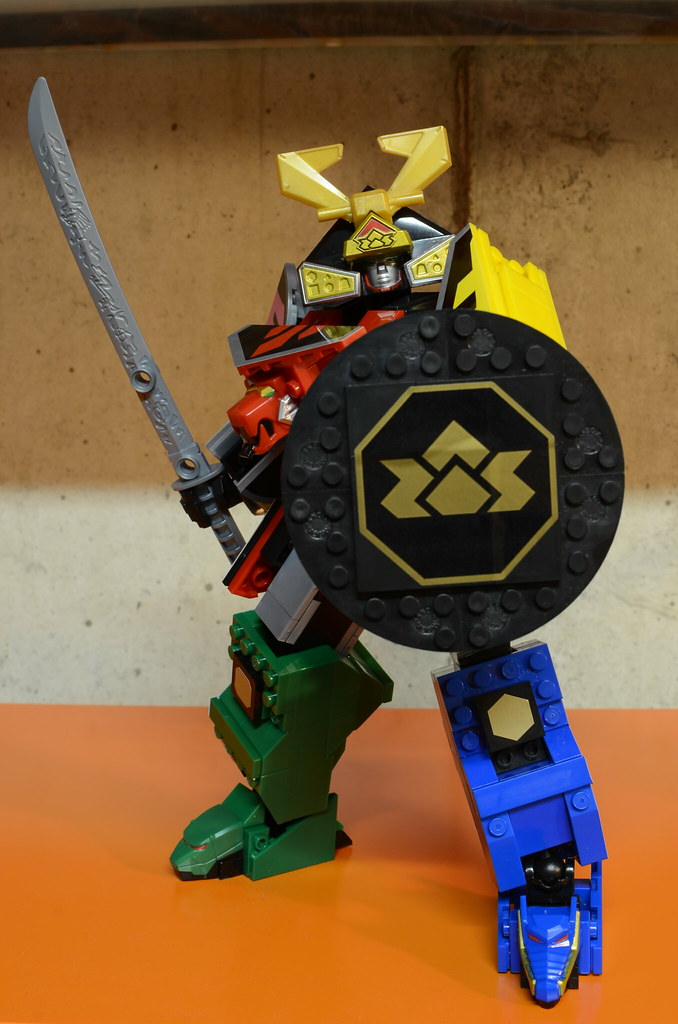
Here's the finished product, unfortunately each limb cannot transform to their respective Origami zords. Although at this price ($25), it should be a known fact. But also surprisinly at this price, the stickers that came with this set were high quality stickers, not those paper sticker crap that a lot of toys come with. These were flexible stickers that fit perfectly, almost too perfectly (hence hard to align properly), onto the parts.
The belt buckle could use some marker lining to make the details pop more.
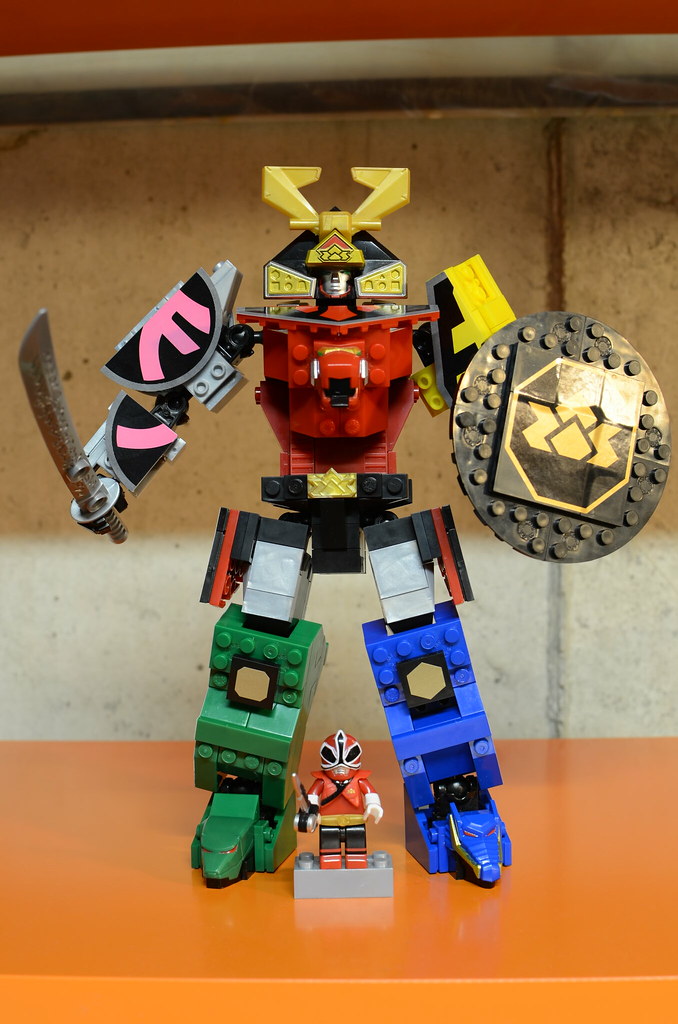
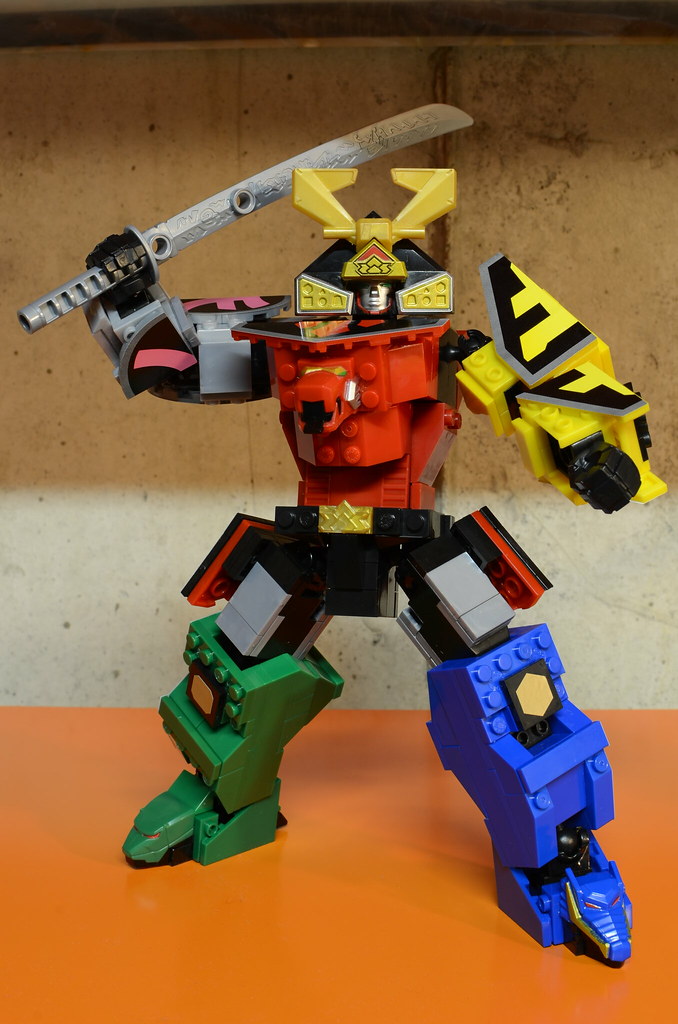
Poseability of this zord is surprisingly quite good. All the joints are ball joints with the exception of the waist swivel. There's a ball joint in the neck, shoulders, elbows, wrists, thighs, knees, and ankles. The joints are tight enough to hold most standing poses, but due to the weight of the zord, he can't do any extreme poses without falling.
One thing I forgot to mention is that the sword comes packaged in cardboard to prevent deformation of the plastic sword which is a nice touch since how many times do we see bent plastic swords right out of the box?
Also as you can see here, although the stickers come for both front and back for the arms, the legs only have stickers for the outer faces. It would have been much nicer if they included stickers for the inner leg faces as well.
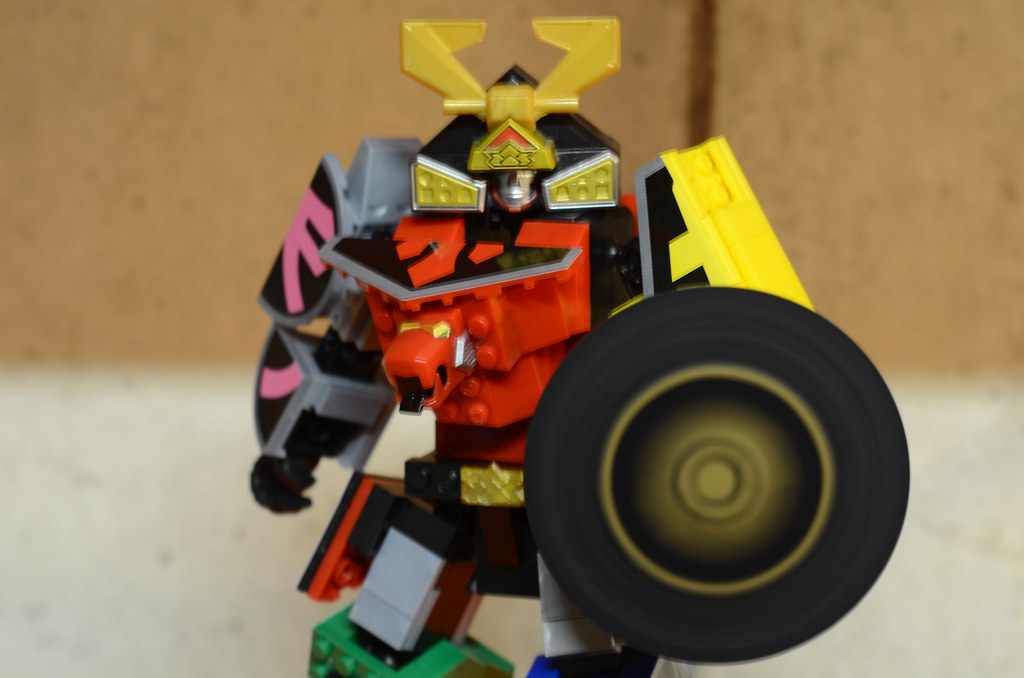
The shield is attached to the back of his left arm via one of those swivel joints allowing it to spin which is one of the gimmicks of this toy. Looks pretty cool eh? Although I am sure if you really want to, you can fix it in piece with the leftover pieces.
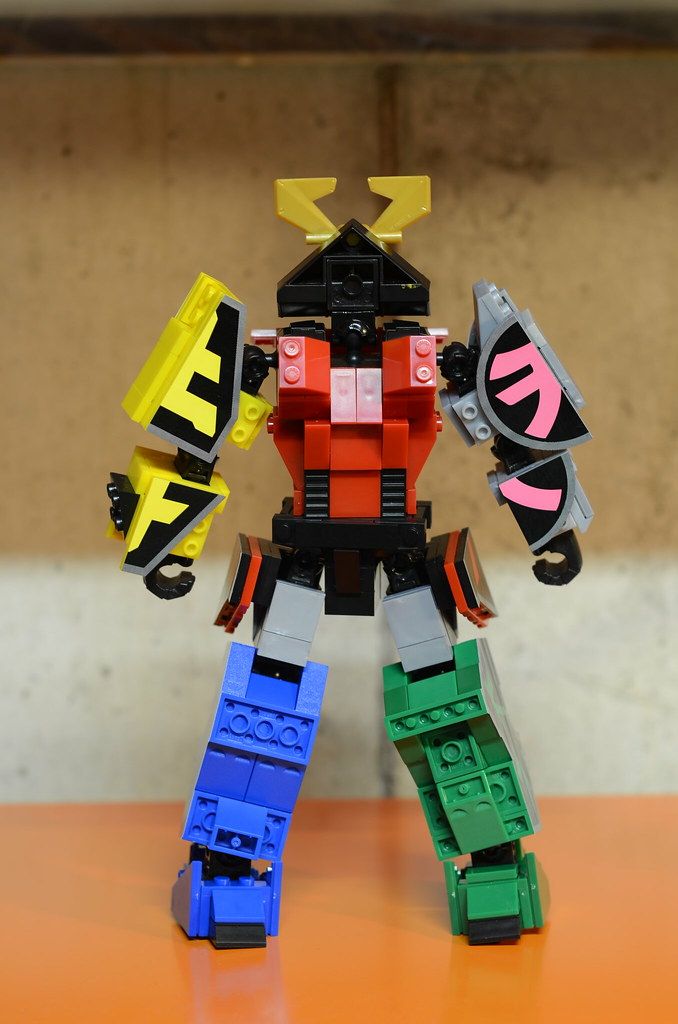
The back of the zord looks pretty good too. One pet peeve of mine are robots that look good in the front, but in the back they look like a flat piece of cardboard.
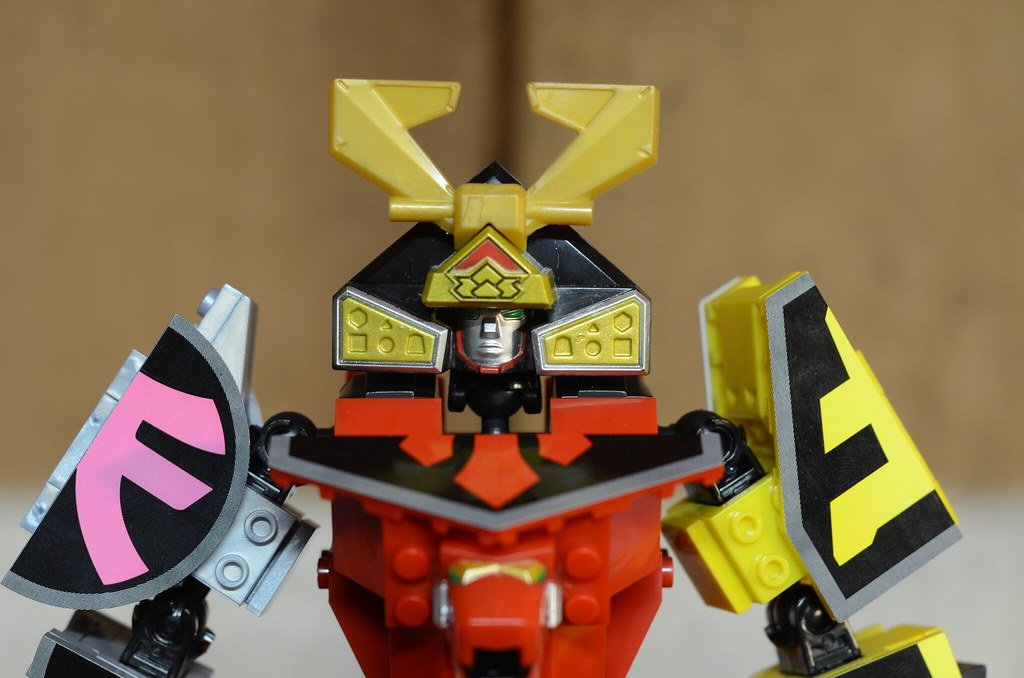
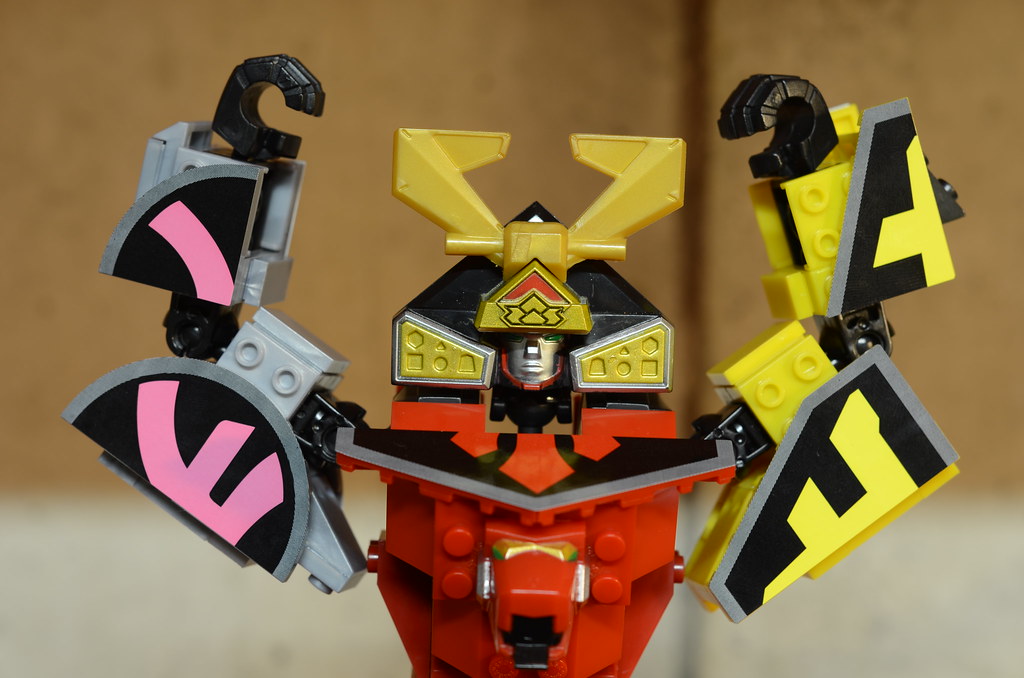
Here's a closer look at the upper torso. Paint apps are pretty good, there were a bit of slop on the edges on the top pieces where the gold transitions to the black helmet part. But they were easily scraped off with the back of an exacto knife. You can also see the hideous neck joint from this angle, but it is hidden in the normal angle like the one taken in the pictures above.
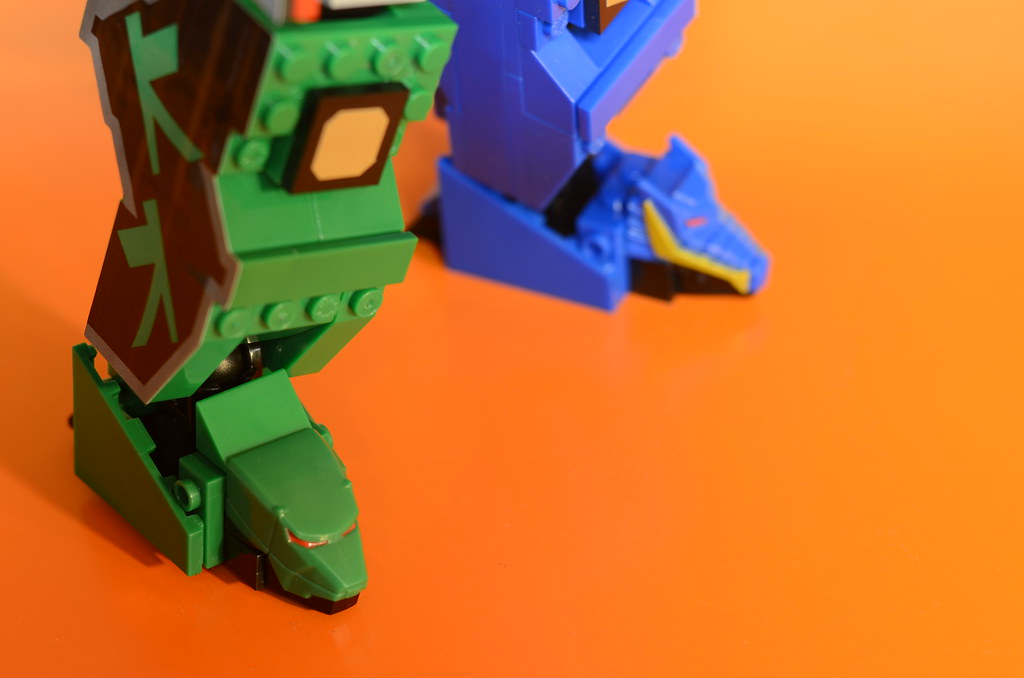
Here are the unique zord head pieces, paint apps are not bad.
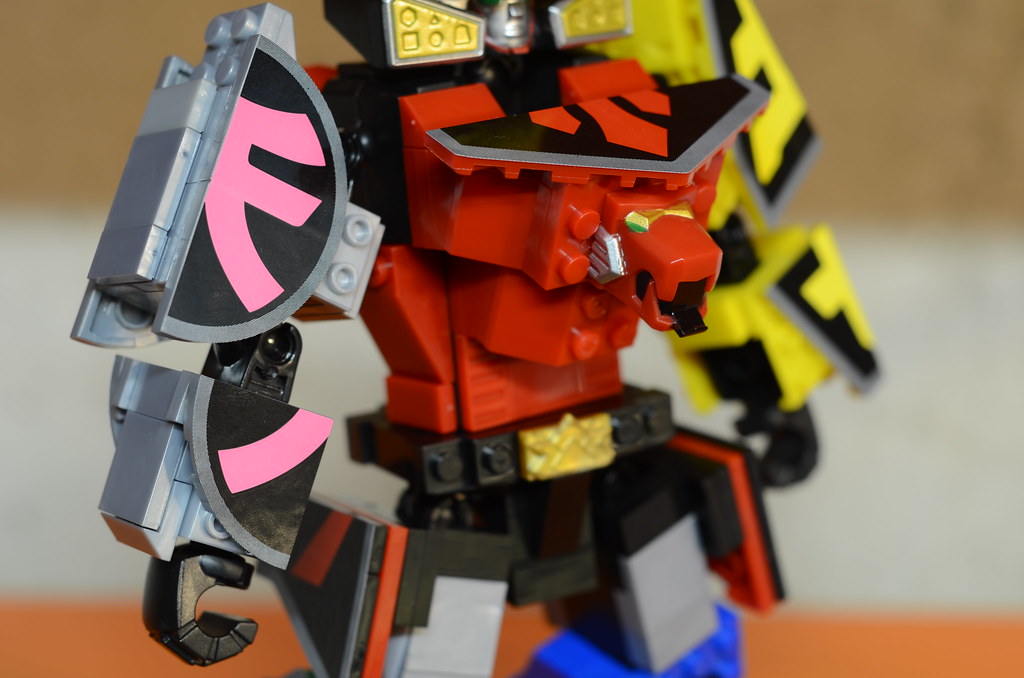
Articulation-wise, this is as far as the elbows can bend due to the inhibiting armor pieces.
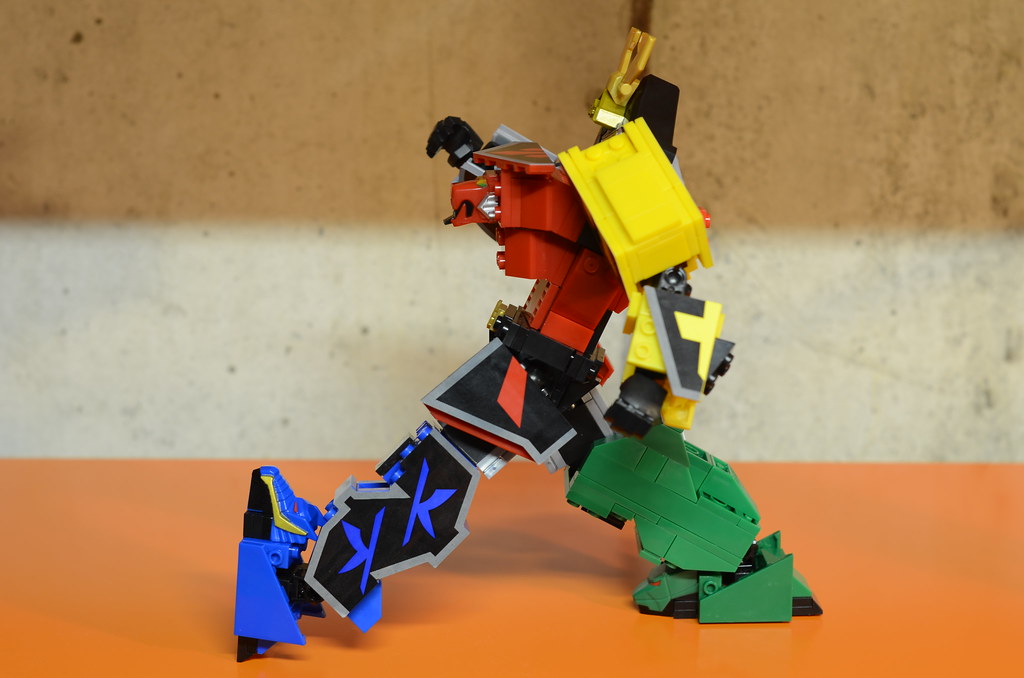
And here, you can see the forward/backward limits in the thigh, knee, and ankle joints. Even though there is a ball joint in the knees, the armor pieces prevent it from going as far as the joint allows. But the ankle articulation is surprisingly good for this type of figure. There is also side-to-side movement in the ankles which can be seen in the previous posing pictures.
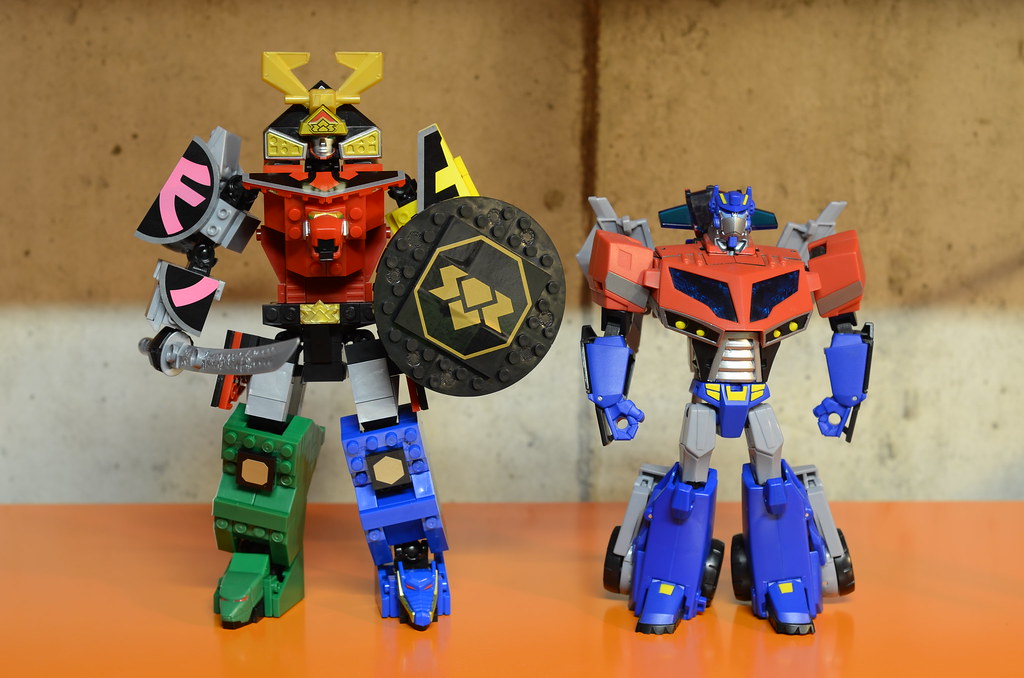
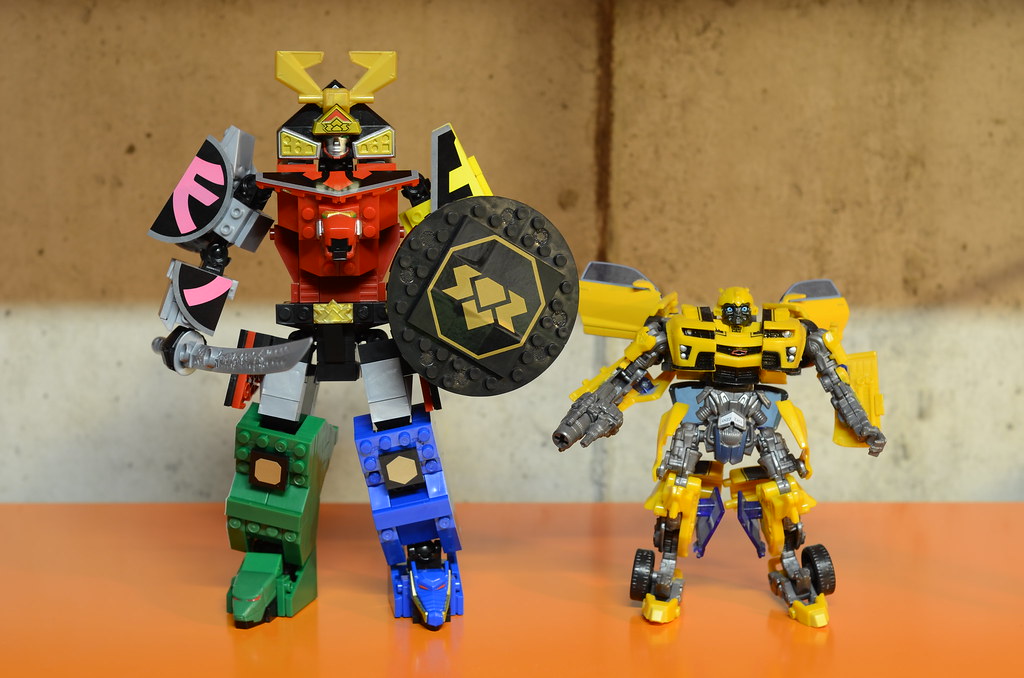
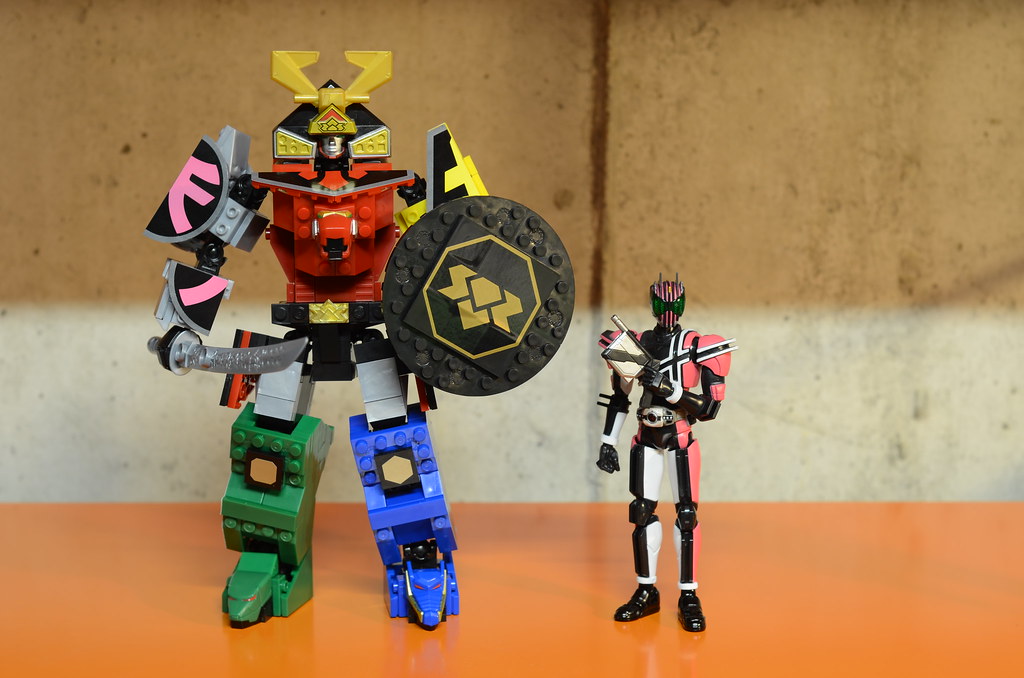
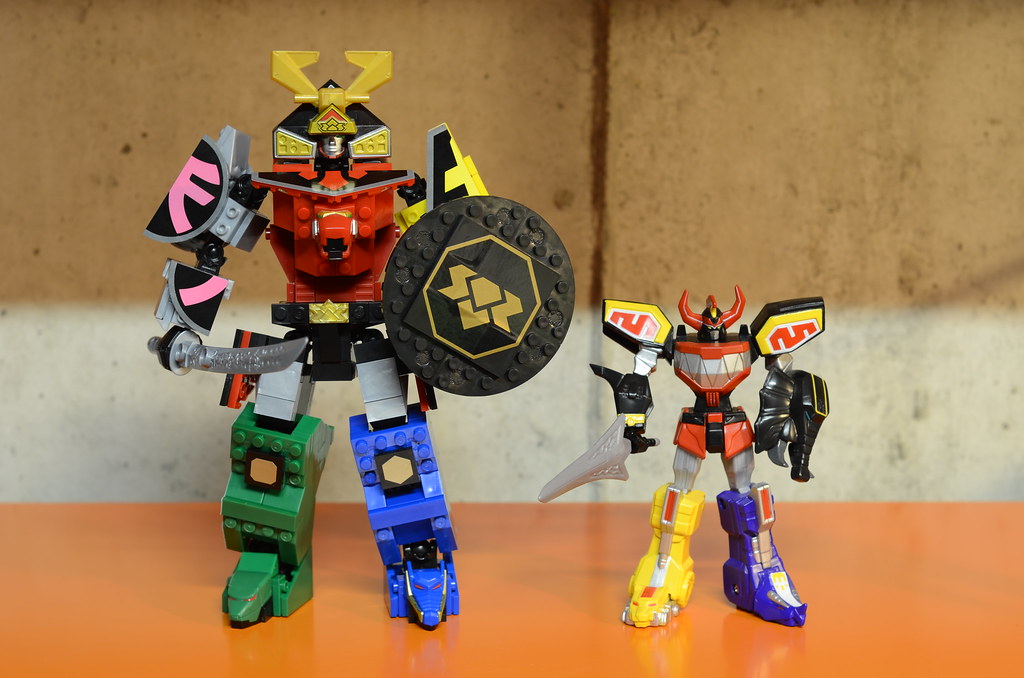
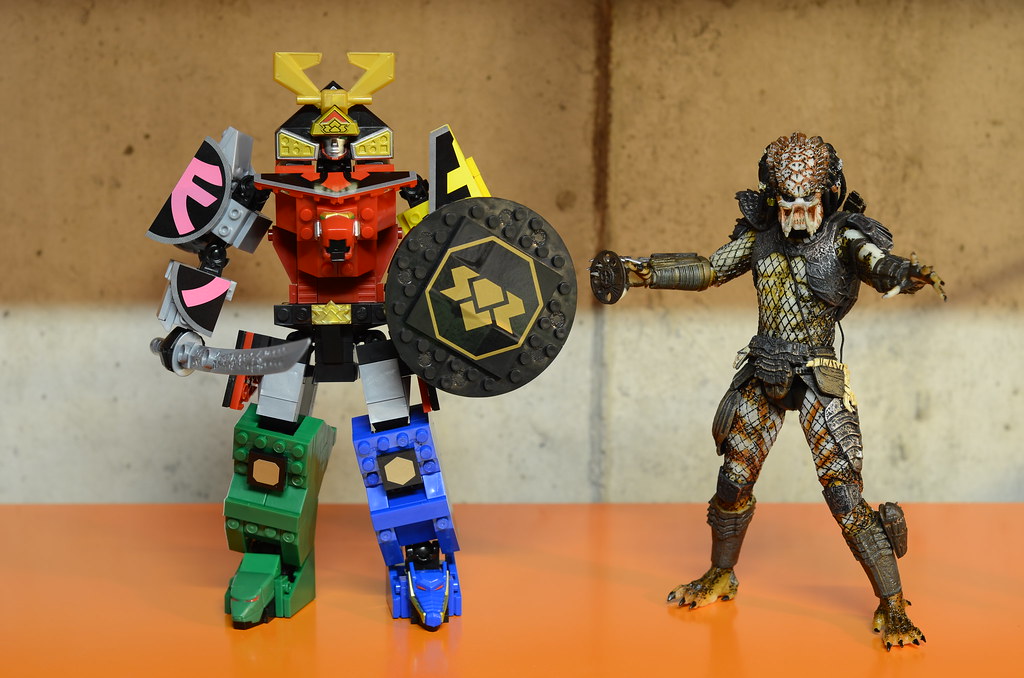
Size comparison time, this figure is huge! I tried to find several common figures to compare with. If anyone wants something else in comparison, leave a message in the comments below and I'll see what I can do.
With Animated Voyager class Optimus Prime
Movie Deluxe Bumblebee
Universe 2.0 Starscream
S.H.Figuarts Kamen Rider Decade
Bandai Retrofire MMPR Megazord
NECA City Hunter Predator (whom I just bought for myself for Christmas!)
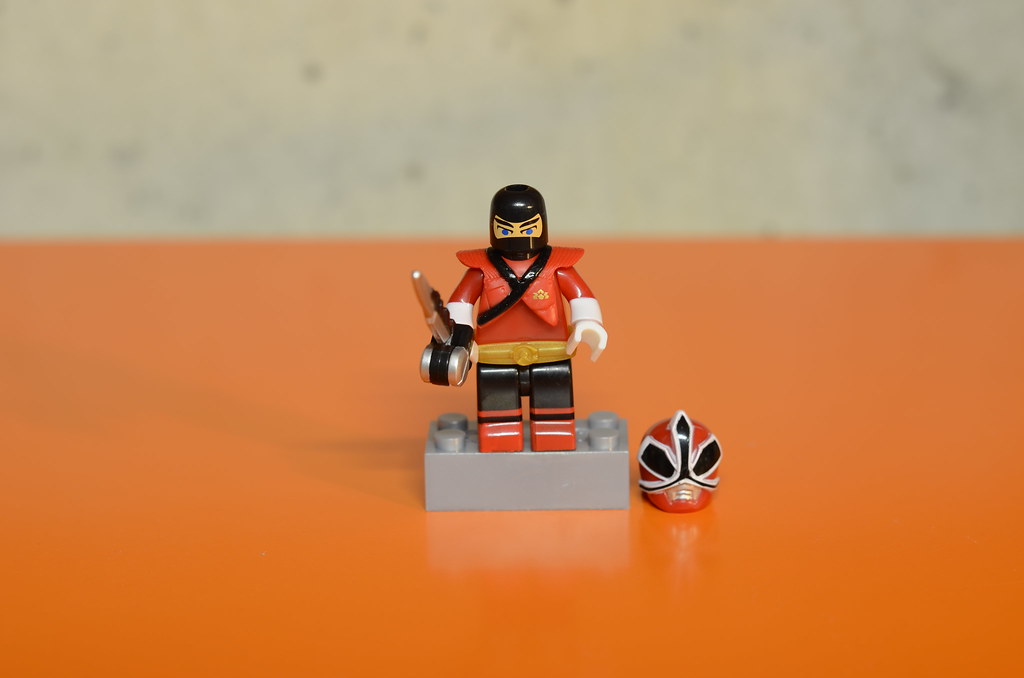
Lastly, here's the minifig that comes with the Megazord. It is the Red Ranger in Mega Mode. I am not sure what difference is the Mega Mode as I do not watch this series. I've only watched several episodes of the Japanese Shinkengers.
The vest and the belt pieces are rubber and are just pieces held between the connecting pieces (so they can be removed).
The helmet can also be removed.
All in all, I am going to say that Mega Bloks has got themselves a winner here. Even with all the new toys I have gotten this year, this one will be in my top 10 for sure. The engineering, the execution, and the quality is just excellent on this set. It was fun to build and also fun to play with. The pieces held together well enough for me to do all these poses and take pictures of them with nothing falling off in the process. This set has truly wiped the negativity I had with Mega Bloks in the beginning. I am not even a fan of the Samurai Power Rangers and yet I am in love with this toy. Although I am a fan of the Mighty Morphin series...sooo Mega Bloks...please give us a MMPR Megazord!!! I highly recommend this set to any Rangers fan or even just fans of robots! It would be awesome if they did Megazords from other lines as well...if they are the same quality as this one, I know I will buy every single one of them for sure.
Now I can't wait to go get the red Origami zord next...
First off, this is my first ever Mega Bloks set. I've always had Lego and had the mindset that anything else is just not as good. Mega Bloks was one of the brands that I avoided since I've always hear bad things about their sets, like missing pieces and poor fitting of the pieces. Therefore I was a little worried when I started to build this set. Let me just clear this up right off the bat, there were no missing pieces at all and the pieces fit together as good as Lego pieces, so there's no worry there.
Since I haven't build a Lego set in ages, I don't remember if they packaged their pieces according to the building steps or not. Most of the "kits" that I've been building in the last ten years were radio control model kits and most of them have pieces packaged in separate bags with letters on them so you can identify which parts came from with bag since some of the kits can contain thousands of parts. This is the first thing I noticed with this set, the pieces seem to be randomly packaged with no labels. The only separation was the bag containing the unique pieces like the zord heads and minifig. I ended up just dumping everything into two separate plastic tray.
The instructions were clearly laid out. There were several mistakes in them, mainly the steps to build the green leg, but they were easy to figure out. (Step C6 uses black 2 unit block, but picture shows green one used, there are no more green ones. And the sticker for the green leg goes on the other face of the leg.)
This is the only shot I got of my building process, finally a use for those plastic Transformers packaging!
Building time took about 40 minutes, most of the time was spent looking for the right pieces. Building is relatively easy, anyone within the age range should have no problem (5+).
Here's the finished product, unfortunately each limb cannot transform to their respective Origami zords. Although at this price ($25), it should be a known fact. But also surprisinly at this price, the stickers that came with this set were high quality stickers, not those paper sticker crap that a lot of toys come with. These were flexible stickers that fit perfectly, almost too perfectly (hence hard to align properly), onto the parts.
The belt buckle could use some marker lining to make the details pop more.
Poseability of this zord is surprisingly quite good. All the joints are ball joints with the exception of the waist swivel. There's a ball joint in the neck, shoulders, elbows, wrists, thighs, knees, and ankles. The joints are tight enough to hold most standing poses, but due to the weight of the zord, he can't do any extreme poses without falling.
One thing I forgot to mention is that the sword comes packaged in cardboard to prevent deformation of the plastic sword which is a nice touch since how many times do we see bent plastic swords right out of the box?
Also as you can see here, although the stickers come for both front and back for the arms, the legs only have stickers for the outer faces. It would have been much nicer if they included stickers for the inner leg faces as well.
The shield is attached to the back of his left arm via one of those swivel joints allowing it to spin which is one of the gimmicks of this toy. Looks pretty cool eh? Although I am sure if you really want to, you can fix it in piece with the leftover pieces.
The back of the zord looks pretty good too. One pet peeve of mine are robots that look good in the front, but in the back they look like a flat piece of cardboard.
Here's a closer look at the upper torso. Paint apps are pretty good, there were a bit of slop on the edges on the top pieces where the gold transitions to the black helmet part. But they were easily scraped off with the back of an exacto knife. You can also see the hideous neck joint from this angle, but it is hidden in the normal angle like the one taken in the pictures above.
Here are the unique zord head pieces, paint apps are not bad.
Articulation-wise, this is as far as the elbows can bend due to the inhibiting armor pieces.
And here, you can see the forward/backward limits in the thigh, knee, and ankle joints. Even though there is a ball joint in the knees, the armor pieces prevent it from going as far as the joint allows. But the ankle articulation is surprisingly good for this type of figure. There is also side-to-side movement in the ankles which can be seen in the previous posing pictures.
Size comparison time, this figure is huge! I tried to find several common figures to compare with. If anyone wants something else in comparison, leave a message in the comments below and I'll see what I can do.
With Animated Voyager class Optimus Prime
Movie Deluxe Bumblebee
Universe 2.0 Starscream
S.H.Figuarts Kamen Rider Decade
Bandai Retrofire MMPR Megazord
NECA City Hunter Predator (whom I just bought for myself for Christmas!)
Lastly, here's the minifig that comes with the Megazord. It is the Red Ranger in Mega Mode. I am not sure what difference is the Mega Mode as I do not watch this series. I've only watched several episodes of the Japanese Shinkengers.
The vest and the belt pieces are rubber and are just pieces held between the connecting pieces (so they can be removed).
The helmet can also be removed.
All in all, I am going to say that Mega Bloks has got themselves a winner here. Even with all the new toys I have gotten this year, this one will be in my top 10 for sure. The engineering, the execution, and the quality is just excellent on this set. It was fun to build and also fun to play with. The pieces held together well enough for me to do all these poses and take pictures of them with nothing falling off in the process. This set has truly wiped the negativity I had with Mega Bloks in the beginning. I am not even a fan of the Samurai Power Rangers and yet I am in love with this toy. Although I am a fan of the Mighty Morphin series...sooo Mega Bloks...please give us a MMPR Megazord!!! I highly recommend this set to any Rangers fan or even just fans of robots! It would be awesome if they did Megazords from other lines as well...if they are the same quality as this one, I know I will buy every single one of them for sure.
Now I can't wait to go get the red Origami zord next...
Monday, December 26, 2011
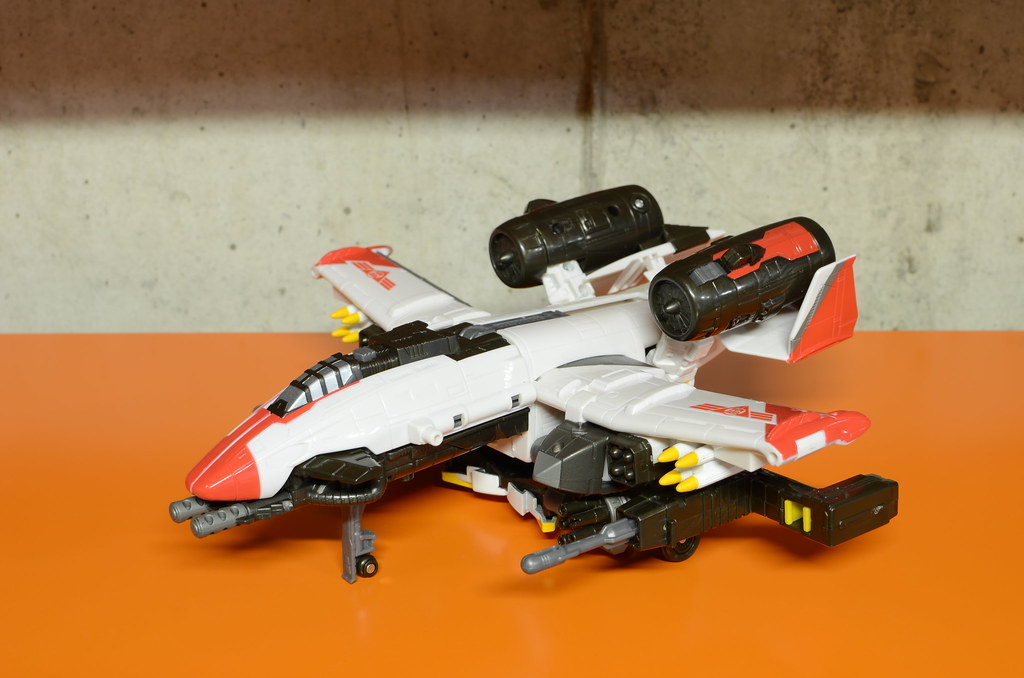
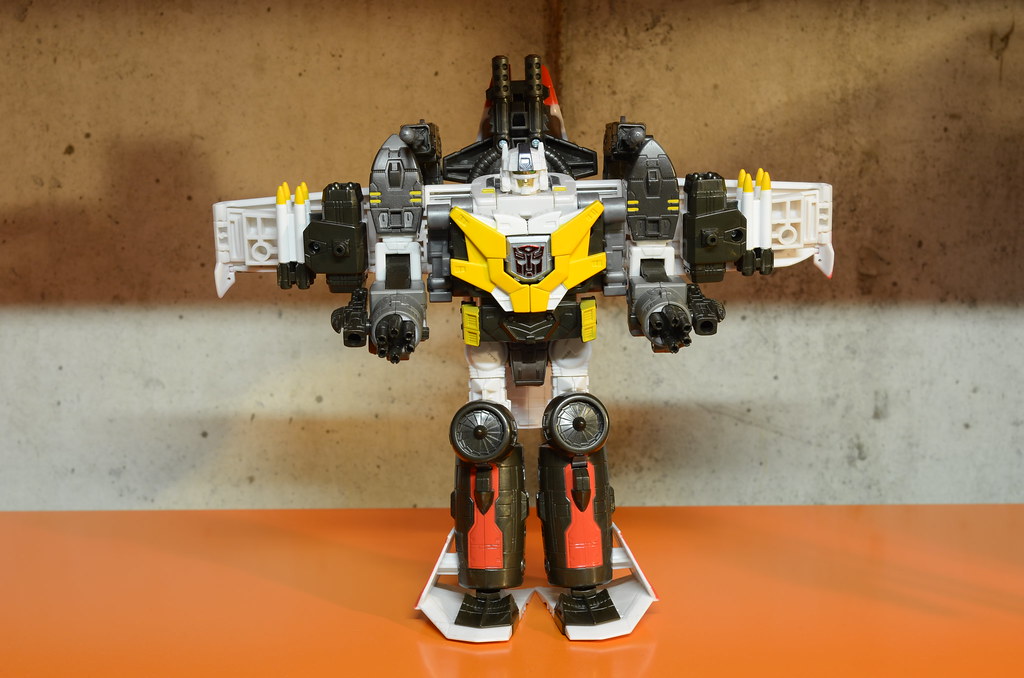
Transformers Cybertron Wing Saber
I got this guy along with the Cybertron Optimus Prime. The seller was selling them as a set. The price was what I was willing to pay for the Prime alone so I got him along before they get sold.
This is Wing Saber in his jet mode.
And his bot mode...nothing special...but
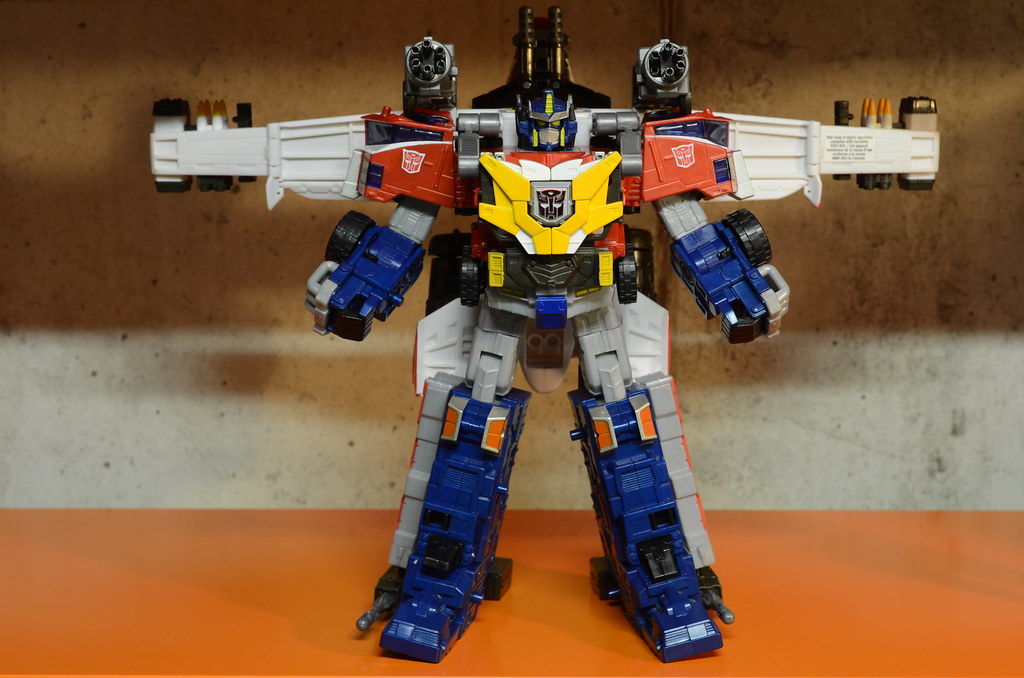
The coolest feature about this toy is that he can combine with Optimus to replace his other "Power pack" to form "Sonic Wing Mode"...this is SUPER WICKED!
So which one do you like more? The original Super Robot Mode or the Sonic Wing mode? It's a close match between the two, but I'd have to go with the original one since that's the one I've always wanted. But this mode looks amazingly cool too...now I want yet ANOTHER one to display in the 2 modes...LOL!
Oh and Merry Christmas everyone!
Wednesday, December 21, 2011
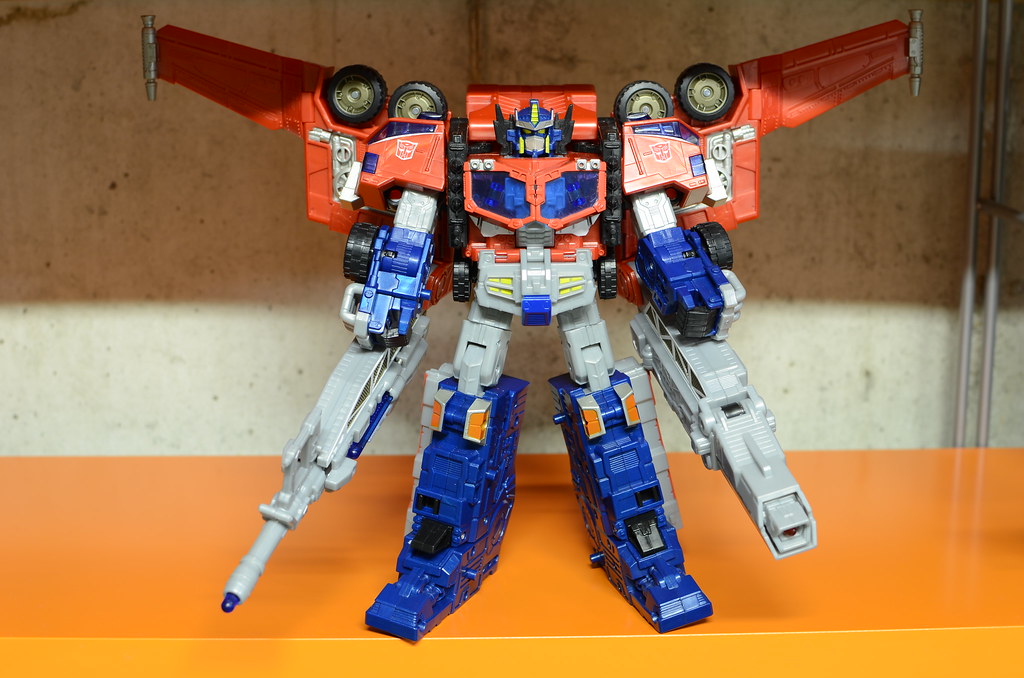
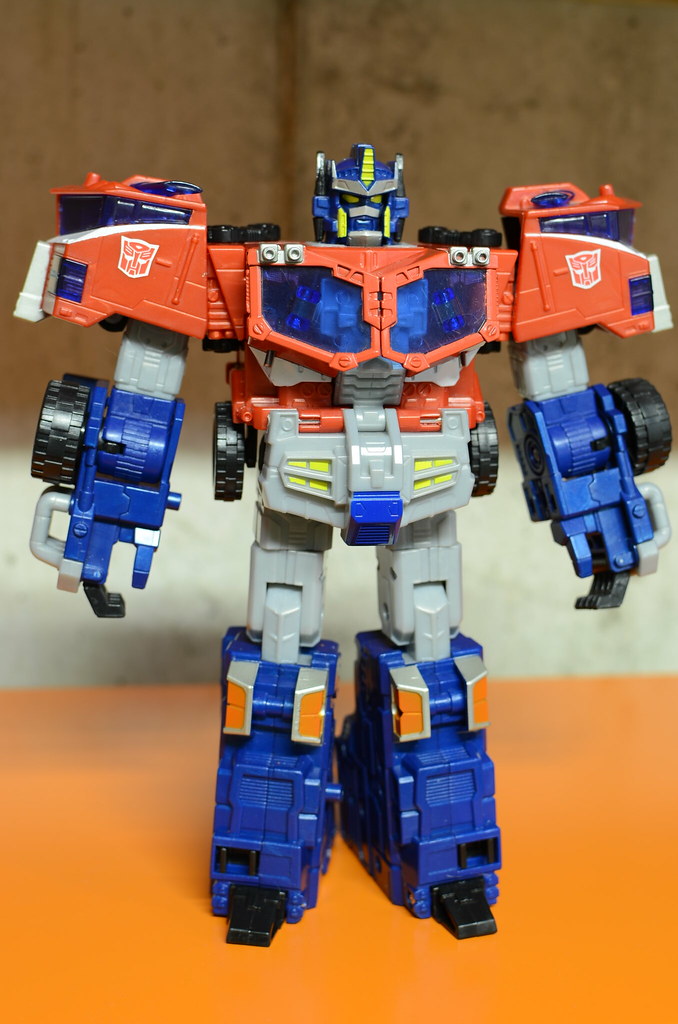
Transformers Cybertron Optimus Prime
I have finally gotten one of my most wanted TF's. I've been looking for one of these for a while, I've seen them at toy shows before, but most dealers wanted $200 for a MIB one, which I could not afford. But recently I managed to score this guy loose for a much better price on the local forum from a member.
I JUST LOVE the vehicle form, if I can find another one for a reasonable price I would get it just to display in this mode.
Here's the basic robot mode, it looks alright...but...
NOT AS AWESOME AS THIS FORM!!!
I JUST LOVE the vehicle form, if I can find another one for a reasonable price I would get it just to display in this mode.
Here's the basic robot mode, it looks alright...but...
NOT AS AWESOME AS THIS FORM!!!
Monday, December 19, 2011
Preorder from Toysrus
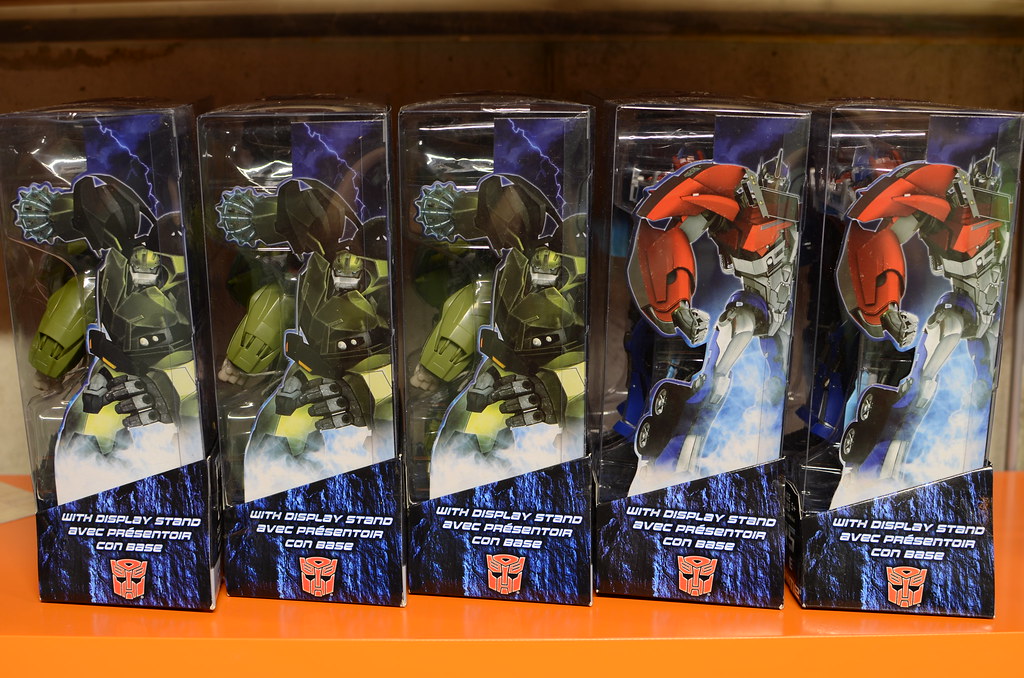
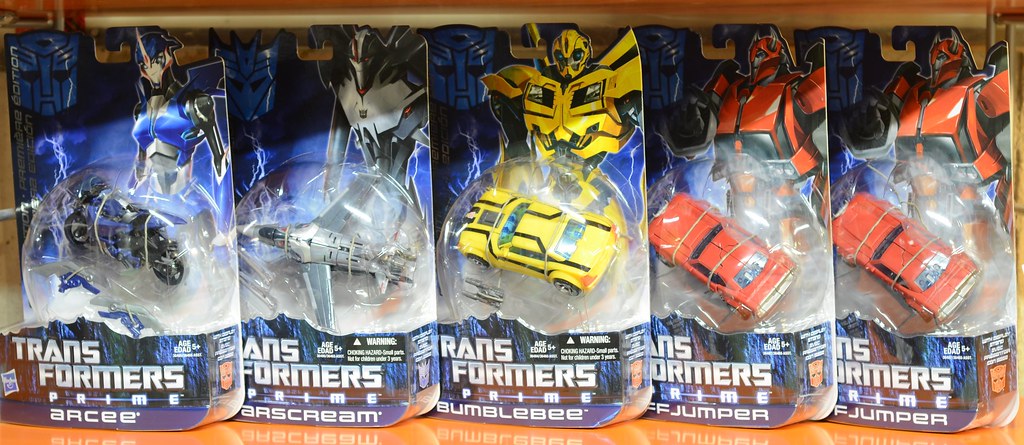
Received my pre-order from Toysrus today containing my Prime Voyagers! It was my first time ordering from Toysrus and it was surprisingly fast. I got the extra Bulkhead to bump the total to over $100 to get free shipping. I figured with free shipping, it would be a while before I received it. But I received the tracking on Friday last week and got the package today! It was shipped via Express mail even with free shipping!
One set is for a friend of mine, and the other set is for me. The extra Bulkhead is just to get free shipping. I am thinking if I should keep it or just sell it off. But I've finally got the whole set of First Edition Prime figures: Optimus Prime, Bumblebee, Arcee, Bulkhead, Cliffjumper, and Starscream. In addition, I also got and assembled my third and last TF shelf yesterday. I am still deciding on how to display them since I have several more TF's coming in the mail and I have to save room for "future additions".
I am looking forward to the TF's coming from the Classics line, Prime line, and the Fall for Cybertron line.
Sunday, December 18, 2011
Unusual haul
I normally don't pick up Legos or any other building sets mainly because I don't have the room to display them. I mean I LOVE them, but I just hate dust getting into all their tiny crevices. I even managed to pass on the KREO Transformers line even though some of them looks really good. But I saw this today and I just couldn't pass up on. It just looks so nicely done for a Megazord done in this format. Although I am still iffy on it being Mega Bloks instead of Lego, but we will see when I put it together. I will be doing a review of it when I do.
I also saw the three origami zords that comes with their respective "Minifig". I wanted to get the red one, but I will see how the quality of this set is first.
Tuesday, December 13, 2011
Recent TF Hauls
Man! The Transformers Prime line have been arriving to Canada continuously lately (before the US too!) and we've been having sales whenever these guys are coming in so it was just buy buy buy for me!
Bee was from last time, but here's wave 1-1.5 of the Transformers Prime Deluxes. Love the CJ mold so I grabbed another one.
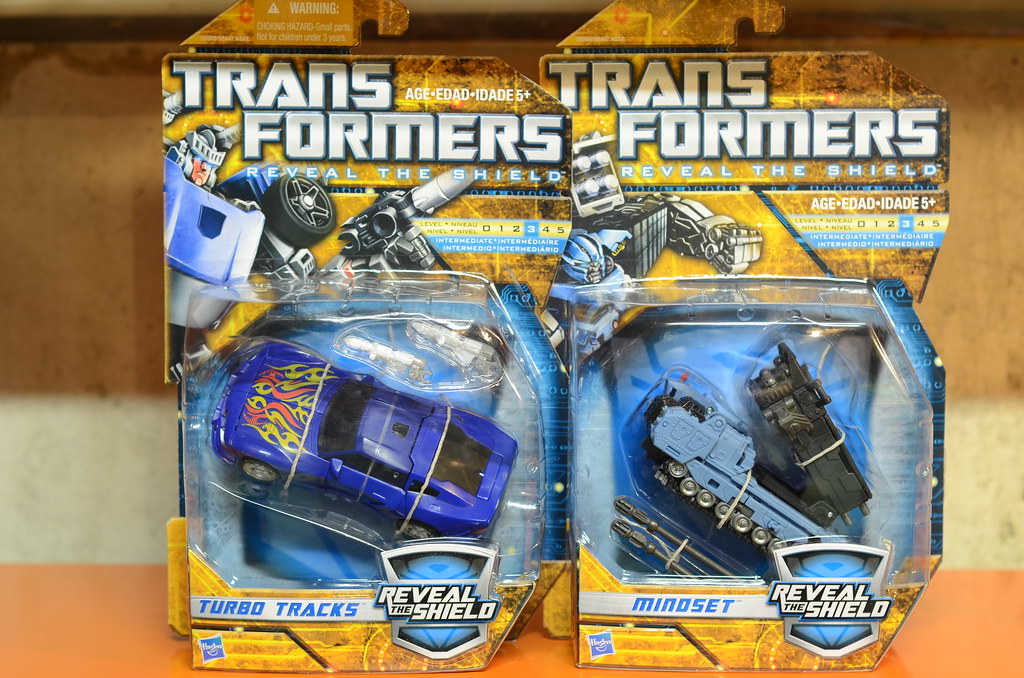
Then I picked up these two guys last night, was hunting for the Reveal the Shield Jazz and Tracks. Managed to grab Tracks, but didn't find any Jazz, got Mindset though since I didn't have this mold yet.
Then I just received a package in the mail today from a cybertron.ca board member containing:
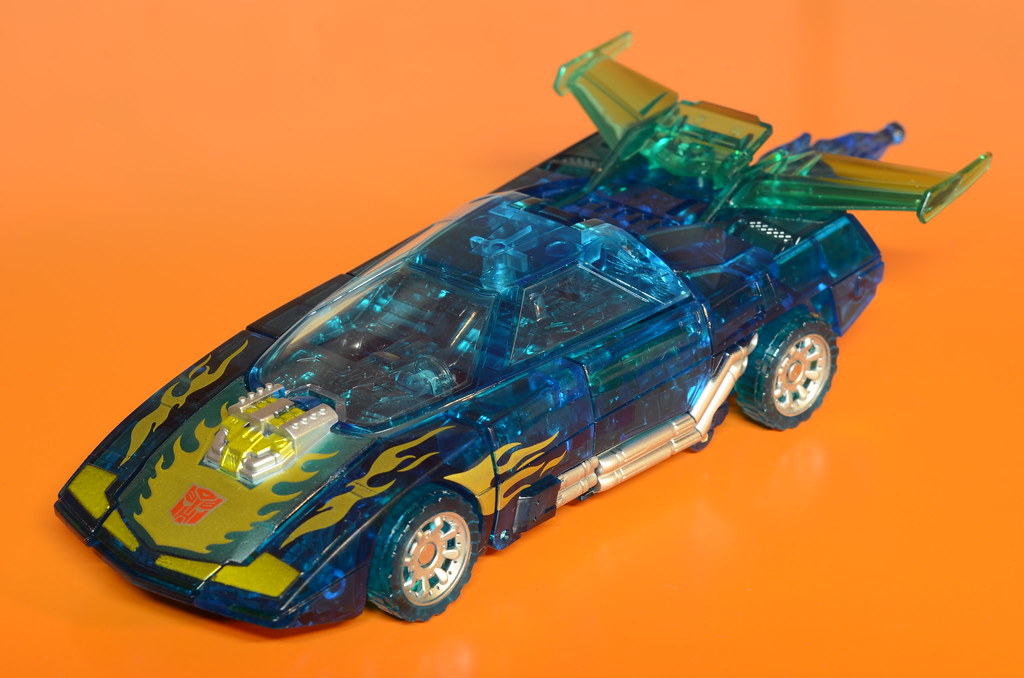
E-Hobby Exclusive Matrix Glow Rodimus (I just LOVE translucent figures!)
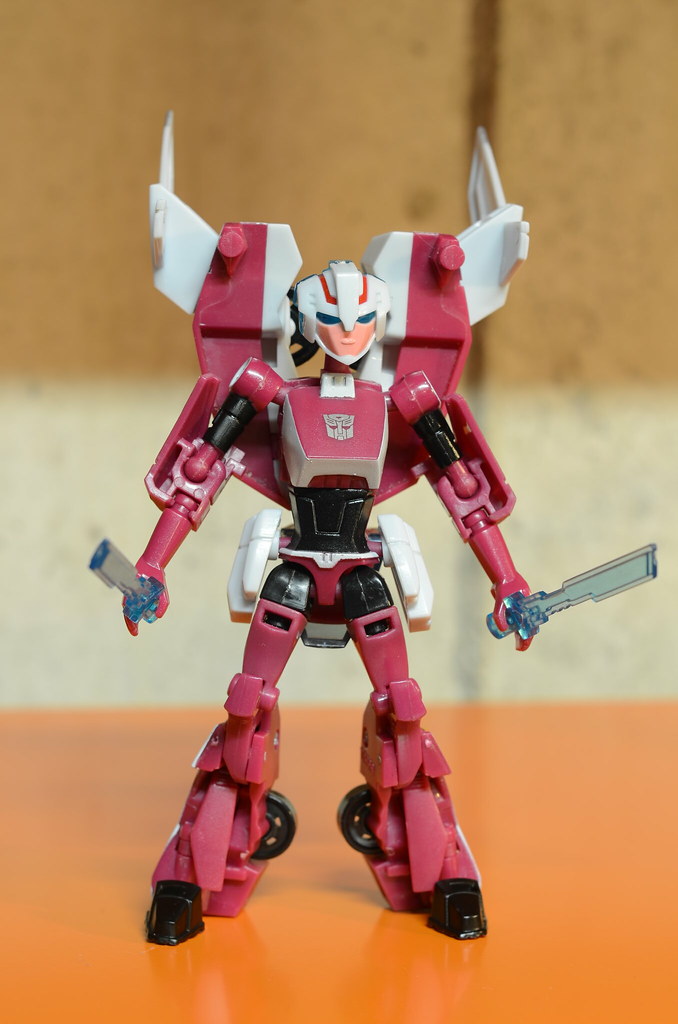
And this sexy ladybot
Due to my lack of shelf space, I've been keeping a bunch of my toys MOC. But I am going to be grabbing another shelf for TF's at the end of this week. Here's 20 MOC TF's lol! Can't wait to crack all these open!
Sunday, December 11, 2011
Fixing up my Predator
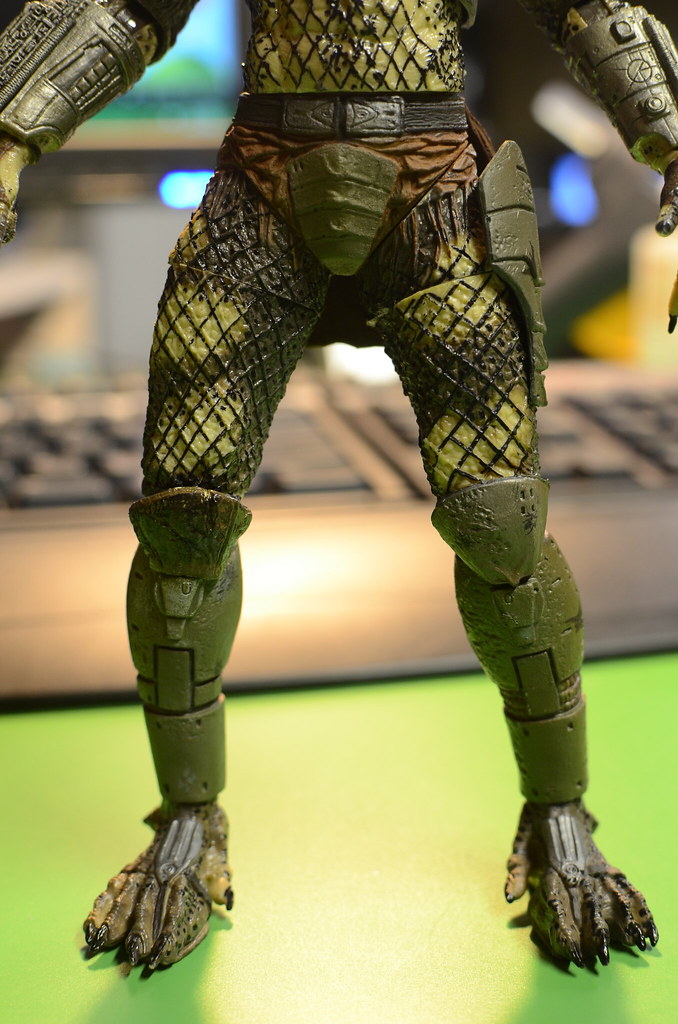
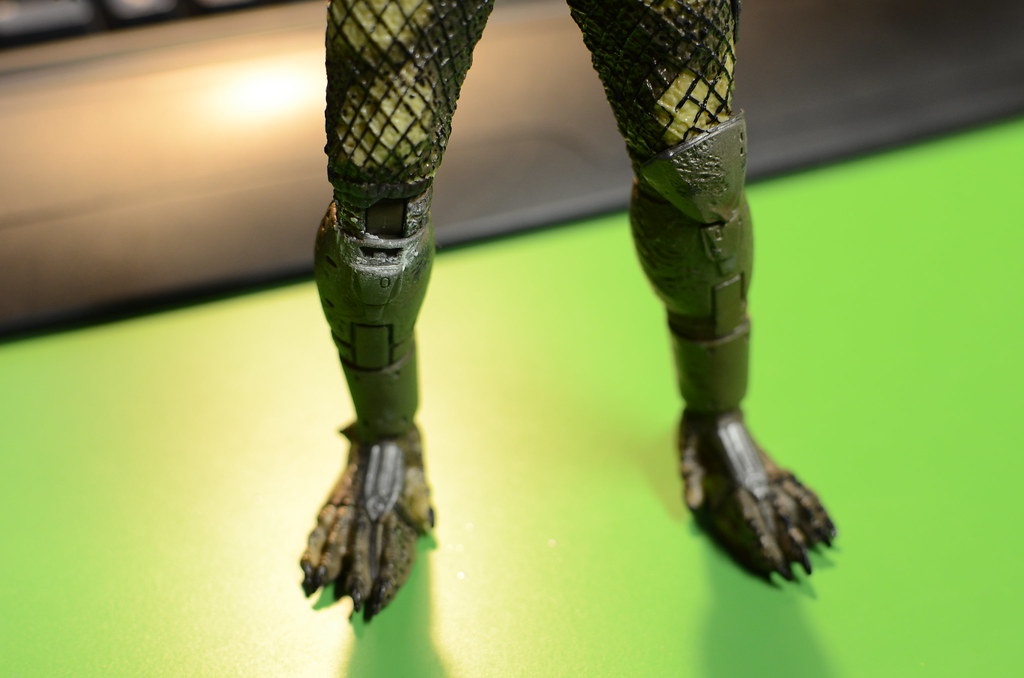
So a bit more than a year ago, I bought a NECA Classic Predator. Right out of the package, it was missing a knee pad. I emailed NECA after to see if I can get a replacement piece, but have never gotten back a response.
I've been meaning to attempt to sculpt a knee pad myself to fix this, but always end up forgetting. But recently I've been looking at the series 4 of the Predator series because of the improved articulation and apparently improved QC on these figures, which reminded me of my bare knee Predator. I end up picking up a pack of SculpeyIII from Michaels and today I decided to take a stab at fixing this.
Here's how it is out of the package, really sucks that they miss this piece right out of the package. After all the QC problems I've had with NECA, it really makes me do a doubletake every time I was about to buy one of their figures. Their Predator line is getting really nice, I skipped out of many of them already, but with the new improved ball hip joints and double jointed knees, I think I am going to pick them up in the end.
Here's what I made from the Sculpey clay, the clay is more sticky than I expected. It left a lot of residue on the figure. I only used the end of a paint brush to smooth the surface and an exacto knife for details. This is the first time I played with sculpting so I think it looks alright. Although it is a bit thicker than I would have liked, but the thickness was needed for it to stand up properly.
Since this Sculpey clay is bake dry, I had to somehow remove this piece from the figure and bake it. That failed as the clay was way too soft and I end up turning the clay back into a small blob. After that I searched the net to see if I could somehow cure the clay while it is on the figure. I found out a common method is to boil a pot of water and dip the figure in it for 30 second intervals. I was scared to deform the crappy plastic on the NECA figure so I only dipped it in for 10 seconds at a time and about 20 times. After using the boiling water method, the clay has harden quite a bit, but not rock solid. I figure since this is my first try I will just work with it like this for now and see how things go.
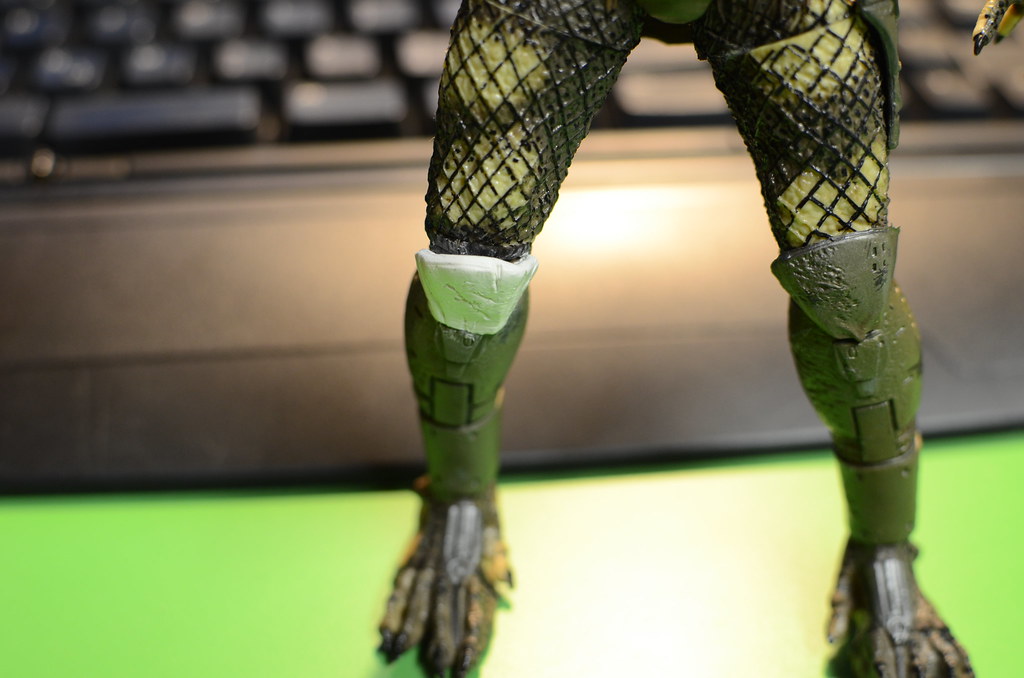
This is after a couple of washes and dry brushing, I couldn't get it to match the color of the other pad so I just did it my way. The paint is still drying as I type this. I will glue it in place tomorrow and see how it holds up.
I think it looks alright, what do you guys think? It sure as hell look a lot better than having the knee joint exposed!
This first sculpting experience was very fun. I am now thinking of future sculpting projects I can attempt haha!
Kamen Rider OOO Display update
Opened and put into display my Kamen Rider OOO Putotyra and Ankh today. For now, this display is done, since these are my favourite forms from the series. There are 3 more forms that I did not get, I am still thinking if I should get those. Maybe if there was some sale on them I might get them then, but for now I am done with OOO.
Friday, December 9, 2011
Quick Review: Hasegawa 1/12 School Desks and Chairs
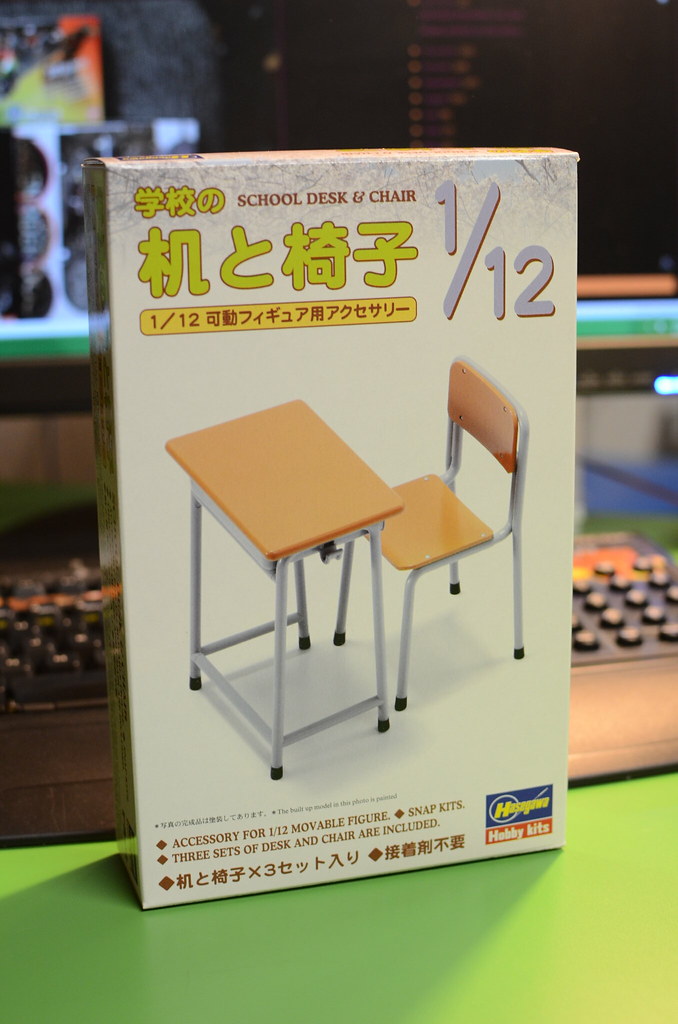
This review is for the 1/12 School Desks and Chairs by Hasewaga, I got mine from Amiami right here.
This kit is one of the things I've been looking forward to in my recent haul. I ordered this without really knowing what to expect, it just seemed like a fun accessory to have.
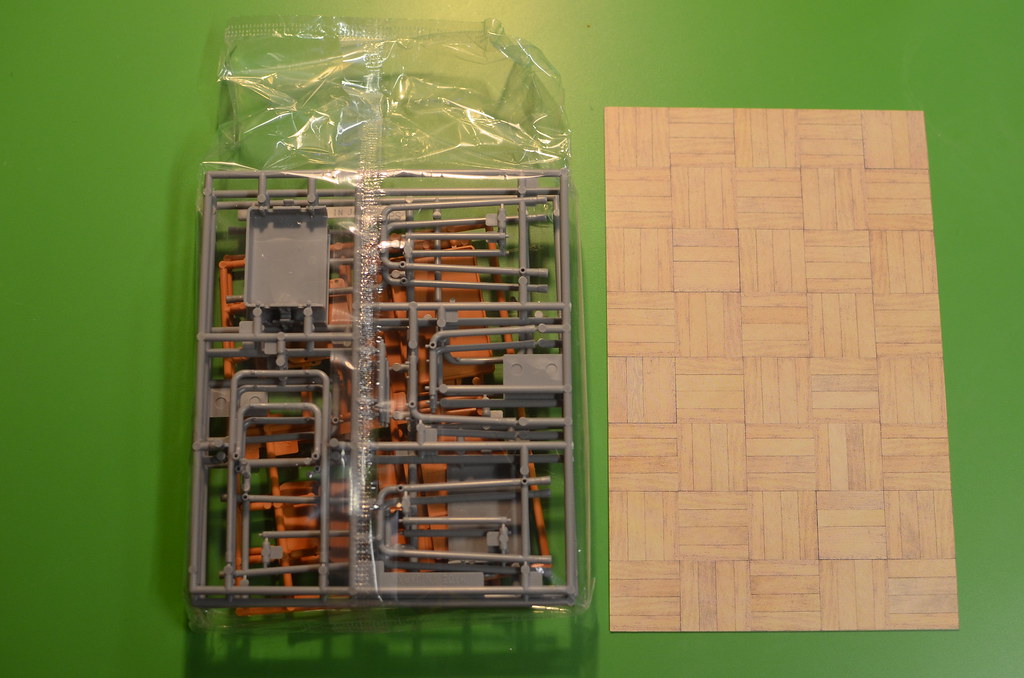
This is a model kit that comes in plastic trees and requires assembly. The kit includes enough parts to build 3 sets of chairs + desks. Also included is a cardboard sheet with tiles print.
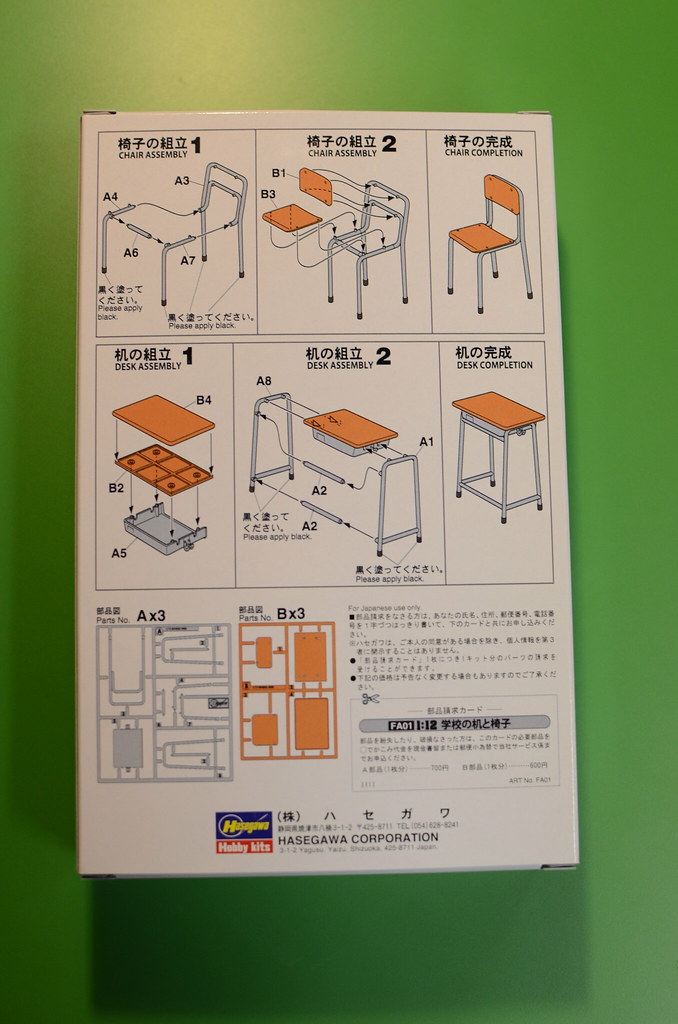
The instructions are printed on the back of the box, they are fairly simple.
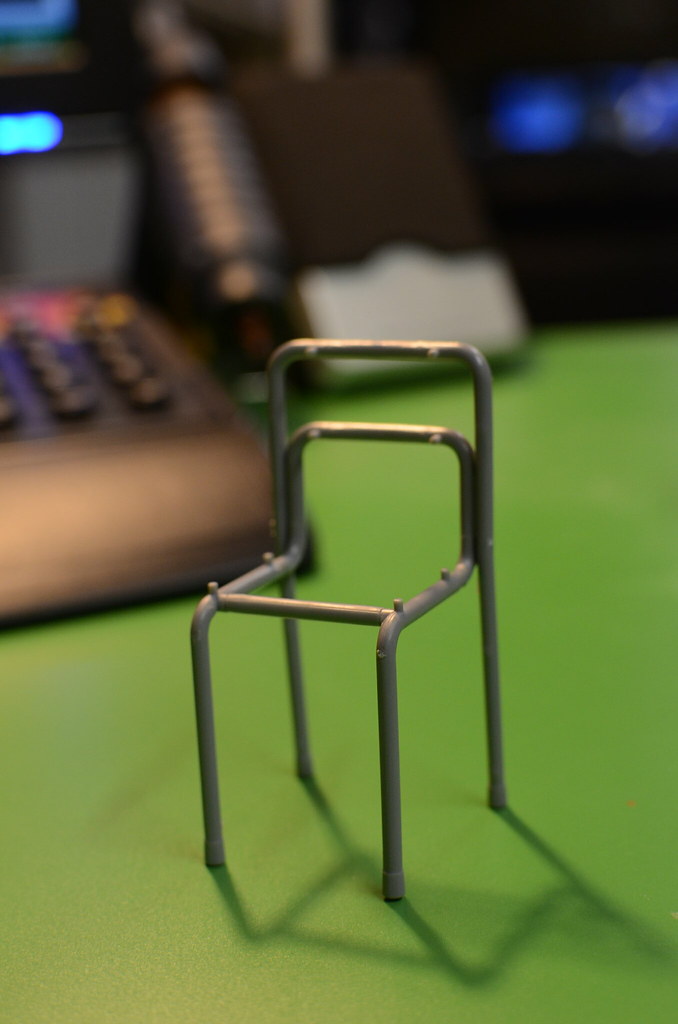
The pieces are quite delicate and detailed. It would look much nicer with a coat of paint on them. I tried to paint it quick and failed miserably so I ended up washing the paint off. I will redo it over the weekend.
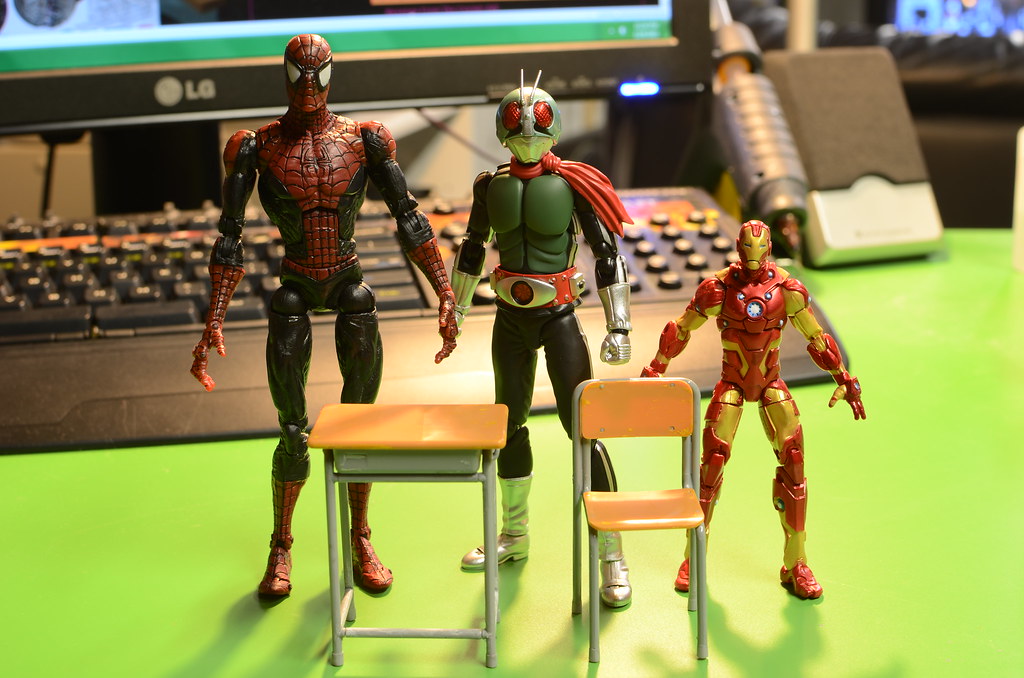
Now the part everyone is wondering, what is the size compared to the figures? I quickly grabbed these figures off my shelves for a quick reference. I will probably take another picture with other figure lines for reference tomorrow.
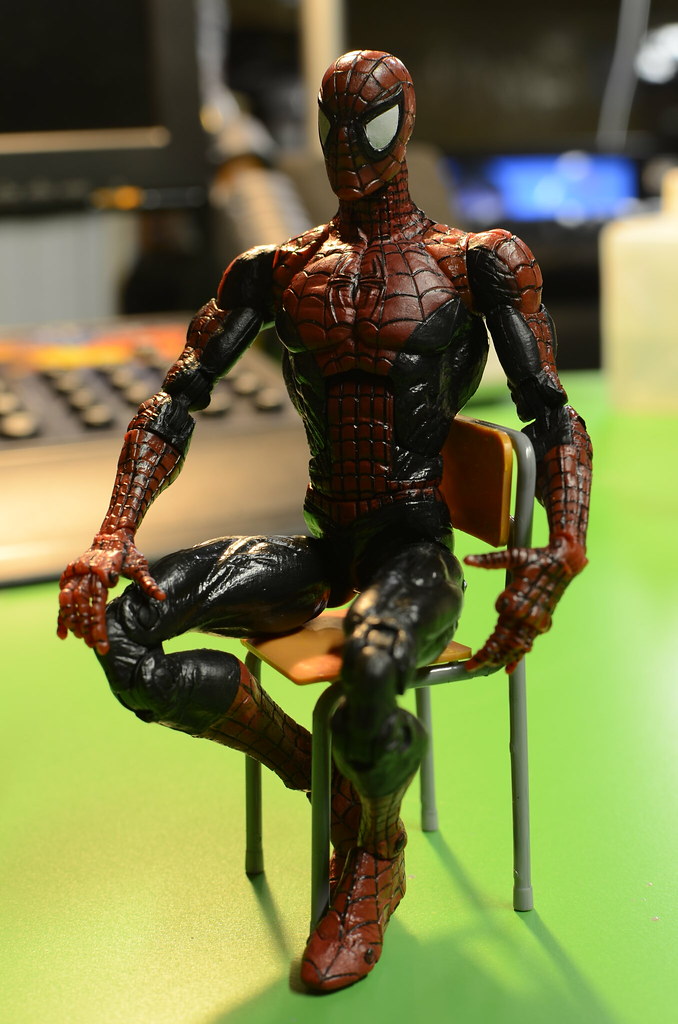
Here we have some pretty common figures. Spiderman is the normal Marvel 6" figure, SHFiguarts Kamen Rider 1 is a bit shorter at probably 5.5"-ish and then we have a Marvel Universe Iron Man at 3.75".
Iron Man doesn't look too happy here, he is too smart for school anyways. I guess 3.75" figures can sort of work with these, but they look like kindergardeners LOL
With the 6" Spiderman, he is just a bit too big. It can still work, he just looks like a big kid.
It's actually not that bad...
And lastly the SHF Kamen Rider which I think is the best fit out of these three figures. I can't help but LOL at this picture too haha
I will put together the other 2 desks and chairs tomorrow and add a few more pics with other figures as well. But so far I am in LOVE with these accessories. It's time that this scale got some more accessories like these. I can foresee a lot of cool and funny toy pictures with these desks and chairs. In fact, I like them so much I just ordered 2 more sets from Amiami haha!
Subscribe to:
Posts (Atom)